The discounted links in this article will give you 75% off of the normal web hosting package. To claim the discount, simply click here to open up Bluehost in a new window and then follow the step-by-step instructions below to get started.
We partner with some pretty awesome companies that offer products and discounts that help our audience achieve their goals. If you purchase through our partner links, we may get paid for the referral (at no additional cost to you). Read our disclosure for more info.
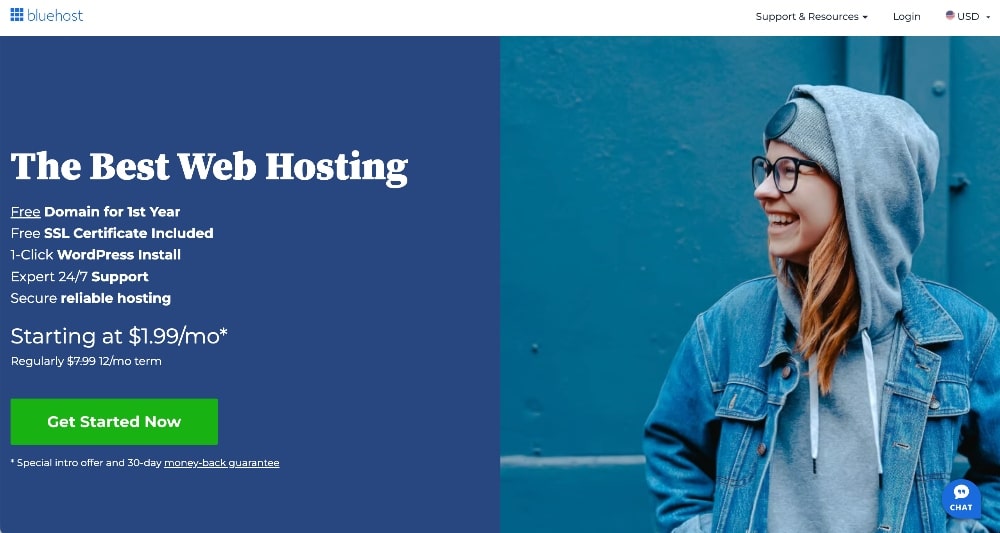
The very first step is to click on the big green button to Get Started Now!
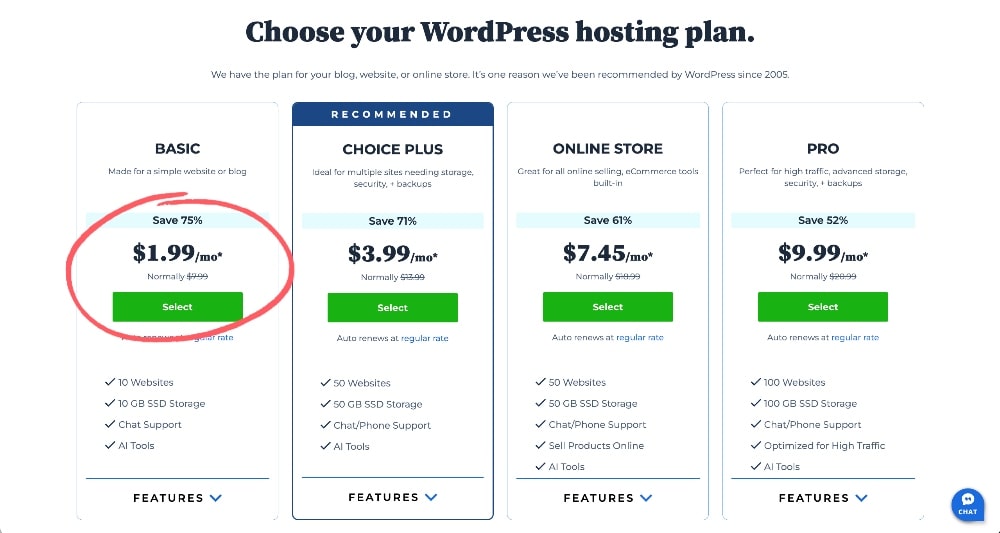
Next, you will see a list of hosting package options. You can choose which plan you think will meet your needs, but most people don’t need anything above the Basic Plan.
Next, you can create your domain name for your blog or you can CHOOSE DOMAIN LATER if you need some more time!
A domain name is the name of your blog and the text that appears in the URL. For example, our blog’s domain name is “createandgo.com/.”
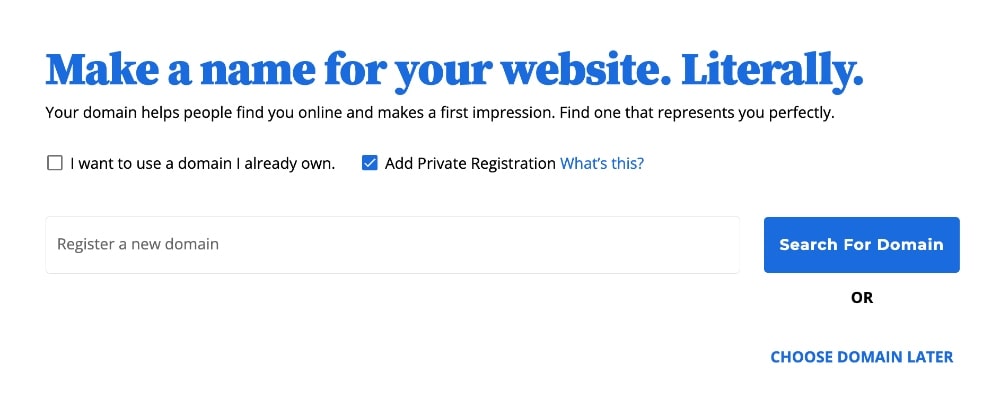
And like we said before, if you aren’t sure what you want to name your blog just yet or are afraid you might change your mind, don’t sweat it!
Just click the link to choose your domain name later!
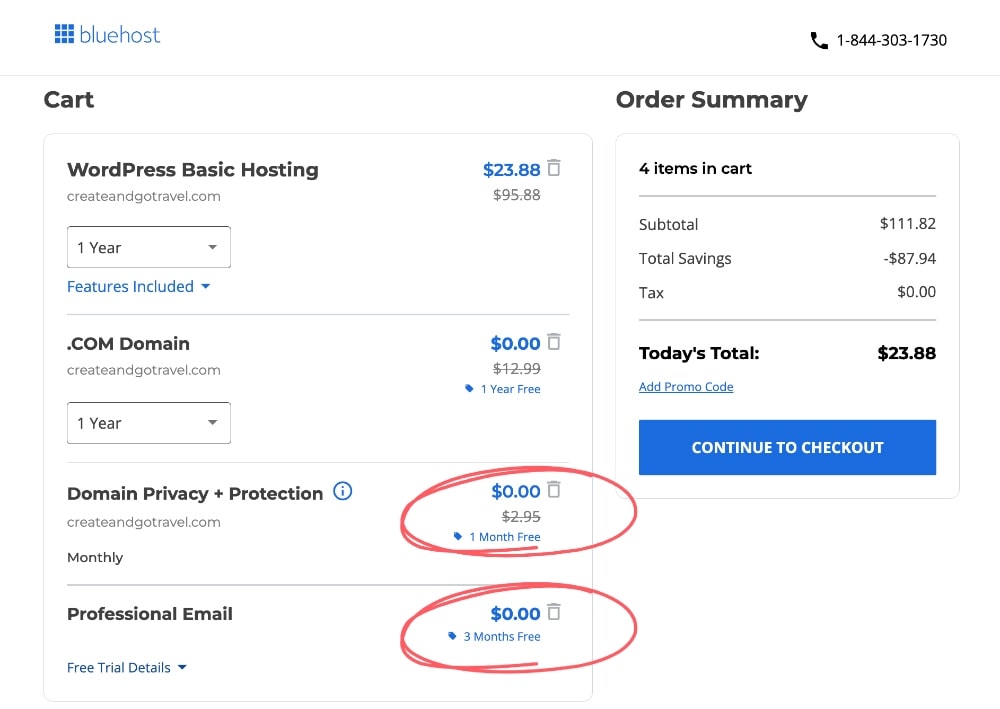
Next, check your cart information and make sure to REMOVE the add-ons for domain privacy protection and professional email, unless you really want them. You don’t need them and they will be extra charges after the free period is over.
Just click the trash can icon next to these two items.
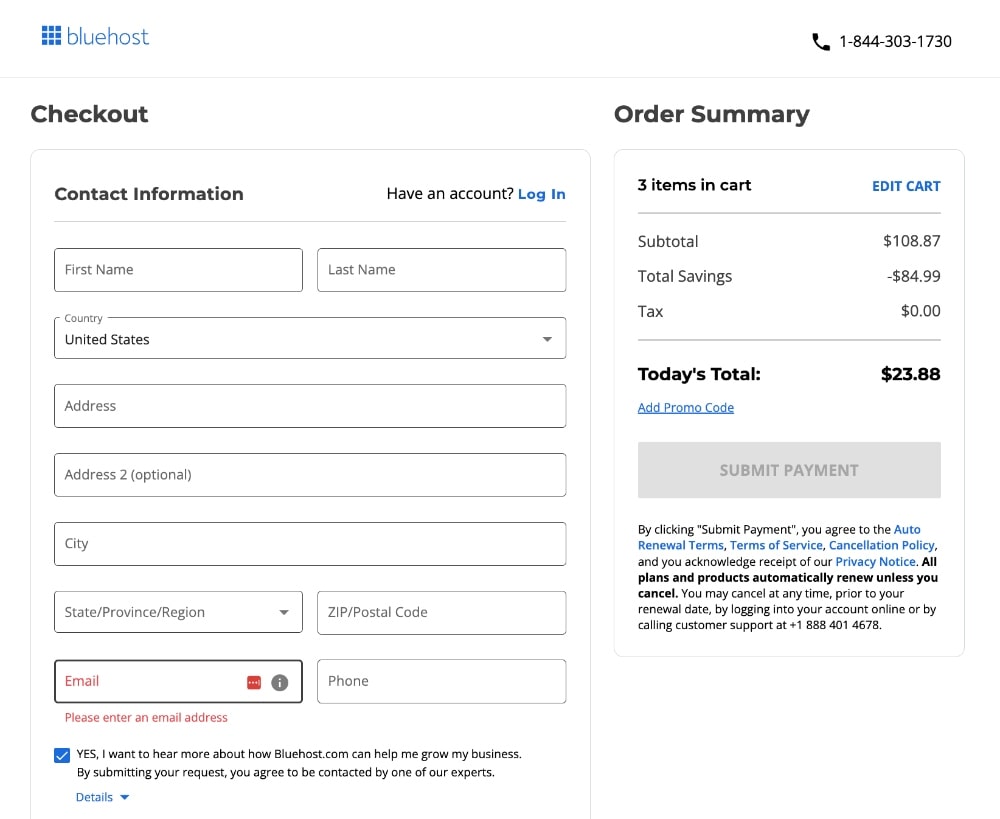
Next, fill in your account info and click to submit payment!
Congratulations! You now own your very own blog and hosting plan!
You will next be asked to create a password for your account.
When you’re finished, make sure to head over to our how to start a blog post to get some additional help with choosing a theme and designing your blog!
Comments