Finding the best WordPress plugins for blogs is a really important step on your path to success. There are literally thousands of WordPress plugins on the market and they can be a huge help when it comes to the customization and optimization of your WordPress site.
Plugins can help to improve all kinds of different elements of your blog, including design, site speed, traffic, monetization, and more. But it’s important to have only the essential plugins installed.
Before I dive into the list of best WordPress plugins for blogs, I want to issue a small warning.
Having too many plugins or poorly designed plugins installed on your website can negatively impact your site speed.
You should avoid downloading plugins for easy and quick fixes and instead, only utilize the ones that provide major changes or improvements that otherwise wouldn’t be possible without the plugin. If you come across a problem and you find a solution via a plugin, make sure you have thoroughly searched for alternative solutions before deciding that downloading the plugin is the way to go.
That being said… All of the best WordPress plugins for blogs on the list below are absolutely essential, helpful, and pro-blogger verified as we’ve used almost all of them here at Create and Go at some point or another!
Many of them were actually recommended to us by web developers who have helped us design our website and improve our site speed and performance.
At the end of this article, there is also a section on how to add and upload plugins to WordPress!
The best WordPress plugins for blogs in this article have been organized by function, and include design, site performance and optimization, blog traffic, and monetization.
What are the Best WordPress Plugins for Blogs?
Here are some of the best WordPress plugins. In this list, there are both free plugins and premium WordPress plugins.
Some free plugins also have a premium version with additional advanced features.
1. UserWay (Accessibility)

Using an accessibility plugin like UserWay will help you make sure that your website is accessible to people with certain disabilities.
This is often very overlooked on most WordPress sites and it’s important for two reasons:
- Everyone deserves to be able to benefit from the information on your blog.
- It’s legally required (to some extent).
There have been waves and waves of lawsuits slapped on small bloggers (and large companies) in the past few years.
Unfortunately, in many of these cases, these lawsuits are filed by a handful of firms trying to exploit small bloggers who don’t have the knowledge or resources to prepare themselves.
This is where UserWay comes in.
It provides a widget that you can display on your WordPress site that provides an extra layer of customizations for certain disabilities, should anyone need it.
For example, it allows someone to change the colors of hard-to-read buttons or pause images with flashing lights that could cause strokes or other complications.
You can also test your website’s accessibility with a free accessibility tool like WAVE.
There is a premium version of this plugin available, but the free version should be sufficient for most users.
Key Features
- Variety of features, including font size adjustment, text-to-speech, and screen reader compatibility
- Advanced features like customizable search boxes and drop-down menus
- Easily customizable colors, themes, and fonts to perfectly fit your website’s design
- A built-in accessibility statement generator for easy compliance with recent laws
- Automatically detects and flags violations of WCAG 2.1 guidelines
- Customizable ADA/WCAG 2.1 checker for maximum accuracy
- Easy integration with existing themes and plugins
2. wpDiscuz (Comments)
wpDiscuz is the best WordPress plugin for customizable comments on your blog.
It has a much cleaner and more professional design than the bare-bones comment area that comes with WordPress, and it also has all kinds of settings that you can customize.

Comments are an incredibly useful feedback tool on your WordPress site.
You can ask questions and have your readers provide answers and feedback in the comment section below your posts.
This feedback can help in a variety of ways, including…
- Getting ideas for new articles
- Learning what people think of your current articles and how they are written
- Helping you figure out what types of products your audience is interested
Not only that, but comments are a sign of engagement and popularity and can help you rank better for Google SEO.
They can also serve as positive social proof when people say nice things about your article and/or your products:

Because of all of that, it’s important to make your blog as comment-friendly as possible. This is why you want a professional-looking and easy-to-use comment form.
With wpDiscuz, you can customize your comment forms a lot more than you can with the native WordPress comment form.
Key Features
- Integration with popular social media networks
- Advanced anti-spam capabilities to protect your community
- Powerful moderation tools to ensure a safe and secure community atmosphere
- Real-time notifications for both website admins and commenters
- Easily customizable comment forms and threads
- Intuitive moderation options for flagged comments and replies
- Integration with popular comment systems, such as Disqus and Jetpack comments
- Ability to customize user roles and permissions for maximum control over your community
3. Fancier Author Box (Author Box)
Similar to the comment form above, the native author box that comes with WordPress looks a little clunky and has very few customizations.
Fancier Author Box allows for additional customizations to your author box.

If you have trouble getting the author box to show up after you’ve installed the plugin, make sure to check that you’ve filled in your bio on your WordPress admin profile.
To do this, navigate to Users from your WordPress dashboard and scroll down to the “Biographical Information” section of your profile.
Key Features
- Highly customizable author bio boxes
- Integration with popular social media networks
- Advanced tracking and analytics for better understanding of your audience
- Automatic display of related posts to drive more traffic to other pages on your site
- Ability to customize the design, layout, font size, color schemes, etc. of the author box for maximum impact
- Automatic author profiles, which can be used to link to other content
4. WPForms (Contact Forms)
The biggest benefit of having a contact form plugin on your website is that it will keep your email address private.
Some of the better contact form plugins, like WPForms, also have more and better ways to combat spam:
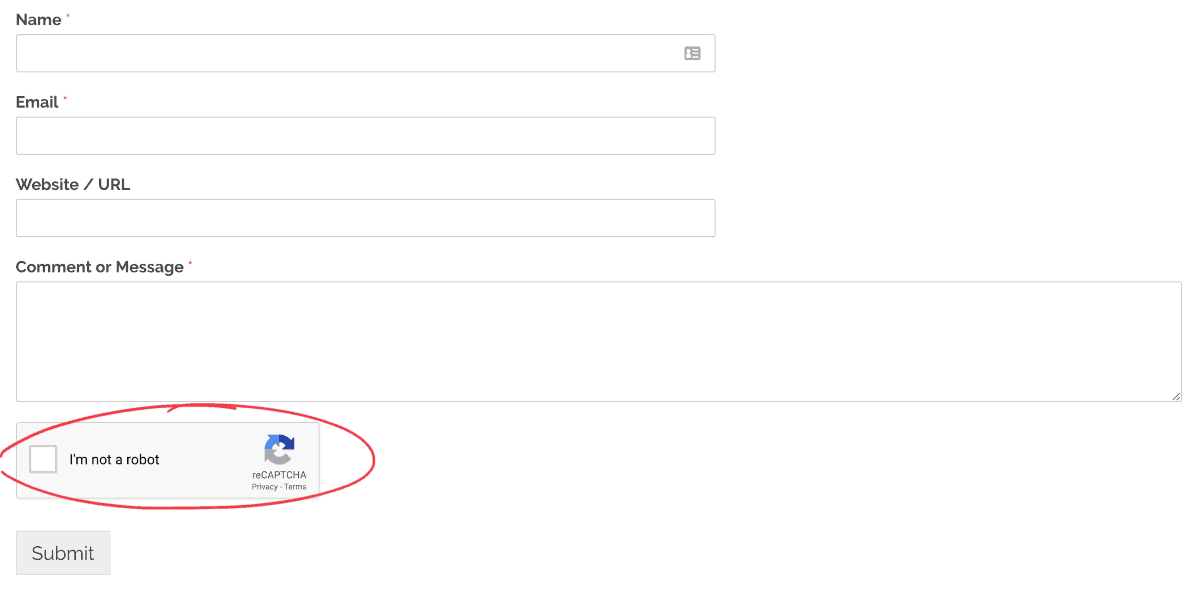
Having a contact form on your site also allows you to specify exactly what email address you want these messages forwarded to.
You can also create multiple forms, so you can create one for your contact page, affiliate applications, etc.
WPForms has both free and paid plans.
Key Features
- Drag-and-drop form builder with pre-built templates
- Variety of field types to choose from, including text fields, checkboxes, dropdowns, etc.
- Powerful analytics tools to track and analyze user submissions
- Integration with popular web services, including payments and marketing tools
- Real-time notifications so you can respond quickly to customer inquiries
- Ability to create multi-page forms for a seamless user experience
5. WP Rocket (All-In-One Optimization)

WP Rocket is pretty well-known for being the best WordPress plugin for all-in-one speed and performance. It helps you optimize your cache, images, and other core vitals of your site.
This is really one of the best WordPress plugins for blog optimization out there and for this reason, this is a paid plugin.
For those of you who are okay with investing in a premium plugin for something so important as website speed and performance, WP Rocket is for you.
Downloading WP Rocket means that you won’t likely need any other image optimization or site performance plugins. This one should do it all for you.
If it’s not in your budget, keep reading for some additional free WordPress plugins that will help you take care of your website speed and performance.
We’ll go into more detail about the specifics of these plugins next.
Key Features
- Automatic page caching for faster loading times
- Advanced minification of HTML, CSS, and javascript files to reduce file size
- Image optimization to enhance website performance
- Database optimization for better storage of data
- Ability to defer loading of non-essential JS and CSS files until needed
- Lazy loading support for images, iframes, videos, etc.
6. Cache Enabler (Performance)
Without getting too technical, caching is a way of storing frequently accessed files in a cache so that they take less time to load.
When you land on a website, that page has to request the web host to download all of the files and coding on the website from the database.
The longer it takes your WordPress pages to load, the higher the likelihood that your readers will bounce (called bounce rate).
In a nutshell, you need a good cache plugin for website speed.
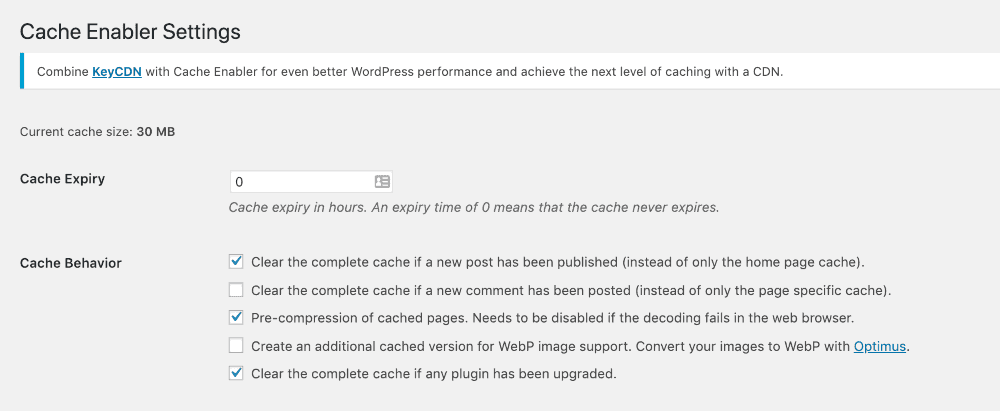
Cache Enabler is a caching plugin that was recommended to us by our web developer.
Some of the settings for the plugin are a little technical, so if you need some help with the recommended settings, check out this article:
W3 Total Cache and WP Fastest Cache are also great, but they have both caused conflicts with other plugins in the past.
Make sure to check on this if you decide to use these (or any plugins, really).
Key Features
- Real-time browser caching to boost website performance
- Simple and efficient file-based page caching for faster loading times
- Gzip compression of HTML, JavaScript, and CSS files to reduce file size
- Cache preloading for automatic cache refreshing of new content
- Automatic generation of WebP images (if supported by the web browser)
- Easy integration with popular caching plugins for maximum optimization
- Ability to set expiration time for cached pages and files
- Support for dynamic caching (for sites with frequent content updates)
- Easy integration with CDN servers to speed up delivery of static assets.
7. WP-Optimize (Caching)
As your blog grows, you will constantly be creating new files and editing and deleting old files. This can be related to posts, images, comments, plugins, or anything else on your WordPress site.
All of these files, even the ones that are deleted, are stored (and take up space) somewhere in your database. A good caching plugin will help you clean out these old files so that your database (and your blog) will run more efficiently – and faster.
WP-Optimize is yet another that was recommended by a web developer.
It helps you optimize your database by showing you what can be cleared out and then performing the optimization process to clear out the old files:
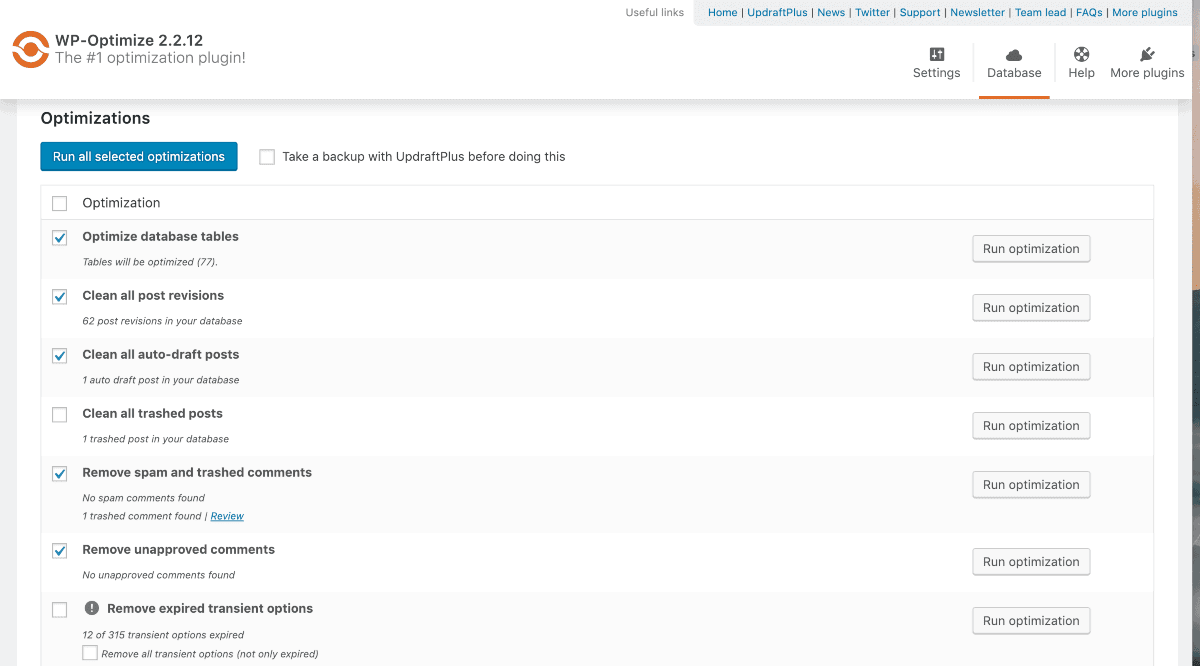
It’s probably a good idea to run these optimizations every few months (at least) or so depending on how active your blog is.
Key Features
- Advanced caching algorithms that improve website performance drastically
- Built-in database optimization tools that help save disk space and boost performance
- Automatic cache flushing for a smooth website experience
- Customizable settings for fine-tuning caching performance
- Integration with popular caching plugins, such as W3 Total Cache and WP Super Cache
- Ability to monitor resource usage in real time
- Option to clear out post revisions or trashed items for improved storage and performance.
8. Resize Image After Upload
Did you know that one of the biggest drags on site speed is not properly optimizing your images?
You can use all the blogging tools you can think of to resize and compress your images before uploading, but they often STILL bring down your page speed.
If you run a couple of your blog pages through a page speed test, you’ll likely see some notifications like this:
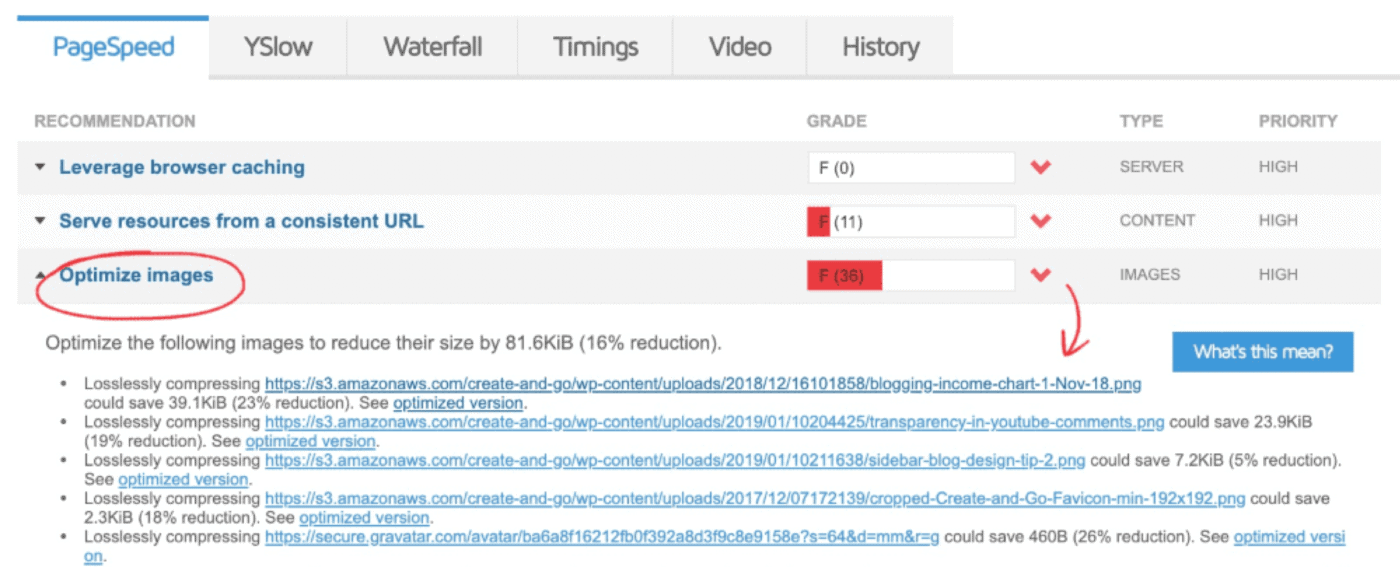
This means that you have some images on your page that aren’t optimized as much as they could be for maximum site speed and performance.
Generally, images shouldn’t be sized any larger than the size that they display on your blog.
In other words, it’s not good practice to upload a really large image and then resize it a lot smaller for a post or other purpose.
But this can be a difficult feat because you don’t always know exactly what size you need for a certain post or other use of every image on your WordPress site.
Resize Image After Upload does literally what its name describes: it resizes images after they are uploaded to WordPress.
You can specify a maximum width and height so that no images are displayed at more than that (making your pages load faster).
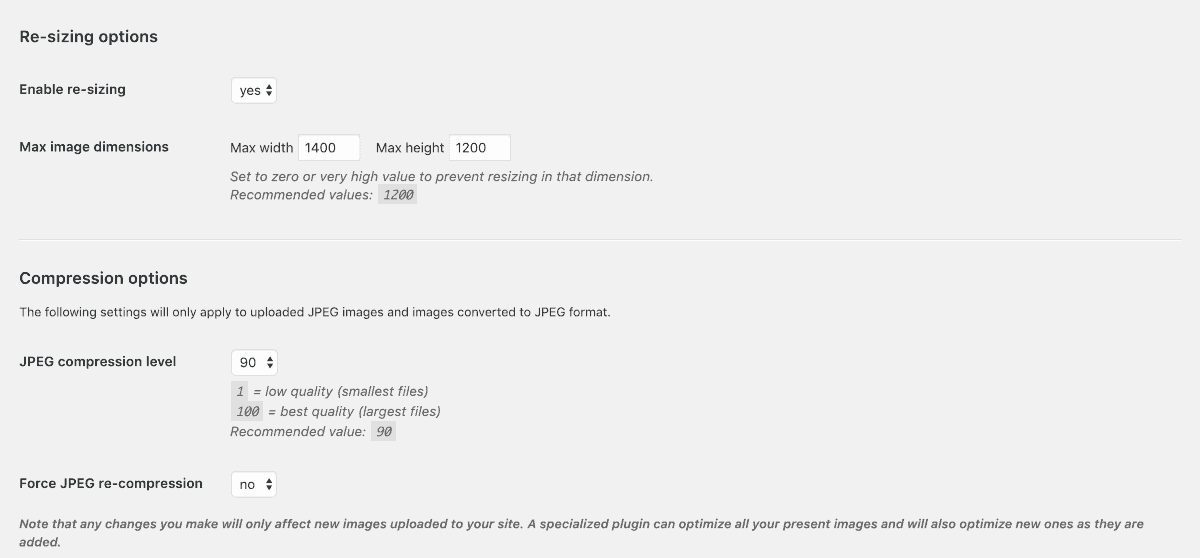
You can also adjust the other settings for compression to further reduce file sizes and improve page speed.
Key Features
- Automatically resizes images to pre-defined dimensions for faster loading
- Option to preserve the original image file, allowing users to choose the size they prefer
- Easily customize the maximum width and height of uploaded images
- Built-in quality settings that allow users to adjust the compression level
- Integration with popular image formats, such as PNG, JPG, and GIF
- Integration with multiple popular gallery plugins for easy installation and setup
- Ability to automatically generate smaller versions of images for faster loading
9. Optimus (Image Performance)
Let’s talk a little more about image compression.
Resizing changes the actual size of an image but compression reduces the quality of a photo, which also reduces the file size of an image.
The key is to balance quality with file size. The goal is to get the lowest file size possible without sacrificing too much quality.
You can use tools like Optimizilla to compress images before you upload them to WordPress, but they can often be compressed even further after uploading.
This is where a plugin like Optimus comes in because you can use it to compress images AFTER they have been uploaded to WordPress.
This is yet another plugin that was recommended by a web developer when he was performing page speed tests.
You can adjust the various settings on specific images:
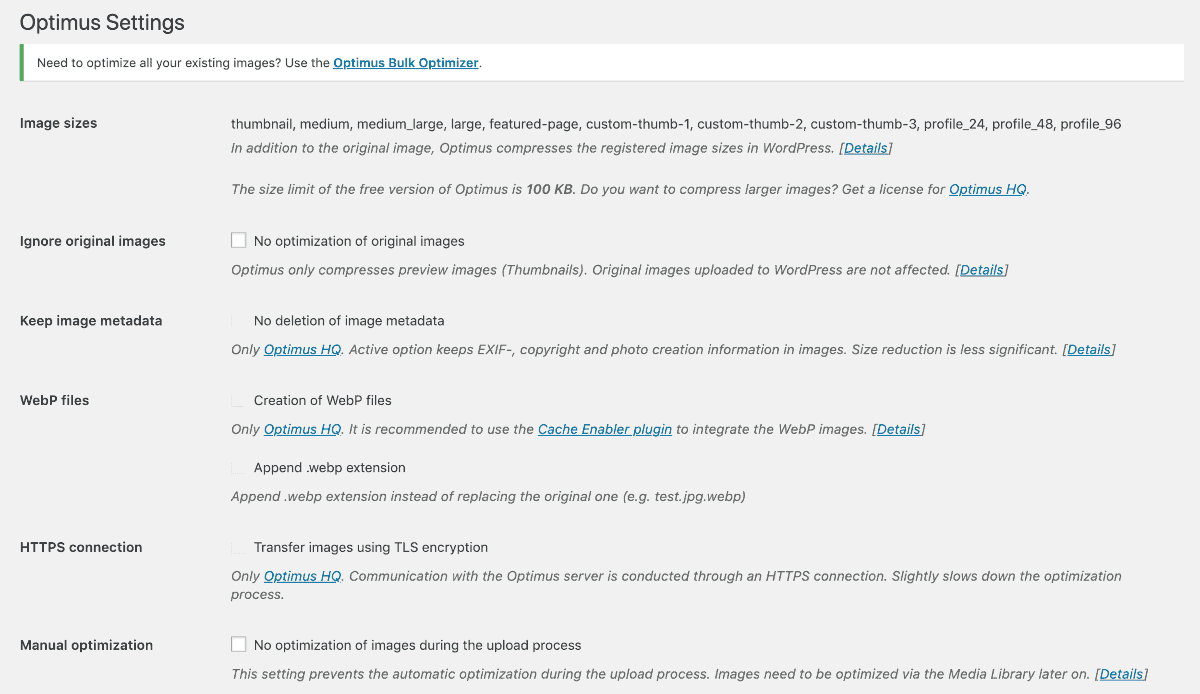
And you can also use the ‘bulk optimizer’ to optimize all of your images at once:

Make sure to run the bulk optimizer at least once every month or two to optimize all new images you have uploaded.
Key Features
- Compress large images into smaller sizes without loss of quality
- Integration with popular image formats such as PNG, JPG, and GIF
- Advanced image optimization algorithms to reduce file size
- Options to choose from either lossless or lossy compression algorithms
- Easily customize the maximum size of each optimized image
- Ability to automatically generate WebP versions of images
- Support for bulk optimization to save time and effort
10. Rank Math (SEO)
Google traffic is VERY difficult to get, depending on what your blog is about, and it takes a lot of time before it starts paying off. Mastering SEO can be difficult, especially at first, and it can be months or more before you see a return on your efforts.
But one of the best things that you can do is to take even the basic steps to optimize your content for Google search.
I call this “passively” going after Google traffic. Because over time, if you’re doing some of the main things right, you will gradually get more and more Google traffic over time.
Rank Math is an SEO plugin that scores your blog writing on how well you have it optimized for Google search, including your use of…
- target keywords
- internal and external links
- image tags
- meta descriptions
- readability
…and other factors that affect your page ranking with Google.
It has a red/yellow/green light system that tells you what you’re doing right and what you need to work on:
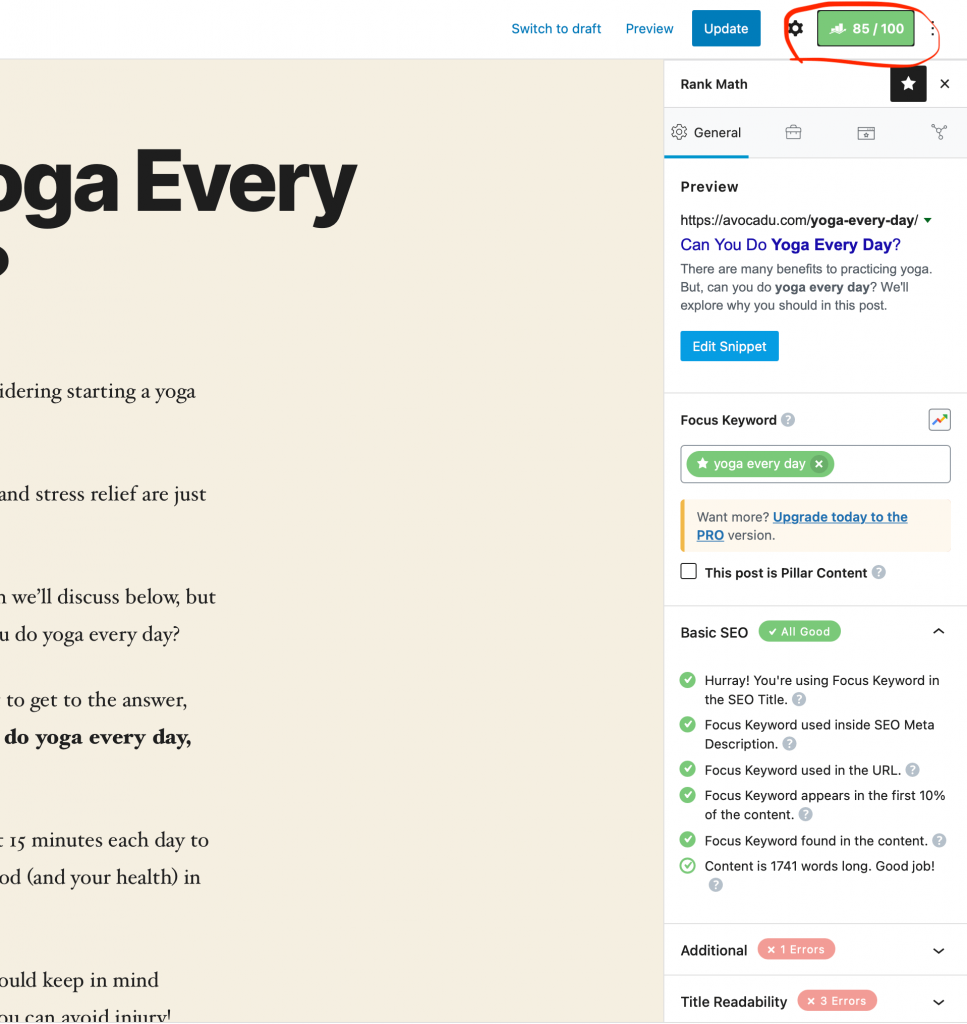
For this post above, I have an overall green light, but I have a few red error messages on my “Additional” and “Title Readability” sections, which lets me know what I have more to work on in that area.
As you can see from the example above, it’s possible to have a green light on your total SEO score, but still have “errors” of red x’s for certain metrics of those measures.
You don’t have to stress about getting a green light or checkmark on everything, but you should try to get an overall green light on all of your posts.
Even if you don’t plan on paying much attention to Google SEO, the Rank Math plugin is a great way to make sure your content is optimized in a fairly passive way.
There is a free version and a paid version, but you shouldn’t need any more than the free version!
P.S. Yoast SEO is another great, free alternative. We used Yoast SEO for years but we now prefer and use RankMath.
Key Features
- Advanced on-page optimization features
- Automatic generation of meta tags
- Integration with popular SEO plugins for maximum optimization
- Built-in XML sitemap generator
- Real-time analysis and recommendations for improved SEO performance
- Ability to control indexing, nofollow/nofollow links, and other important settings
- Schema integration for better visibility in search engines
- Integration with Google Search Console, Analytics, and other popular webmaster tools.
- Easy integration with popular page builders for improved SEO performance
11. MonsterInsights (Traffic and Analytics)
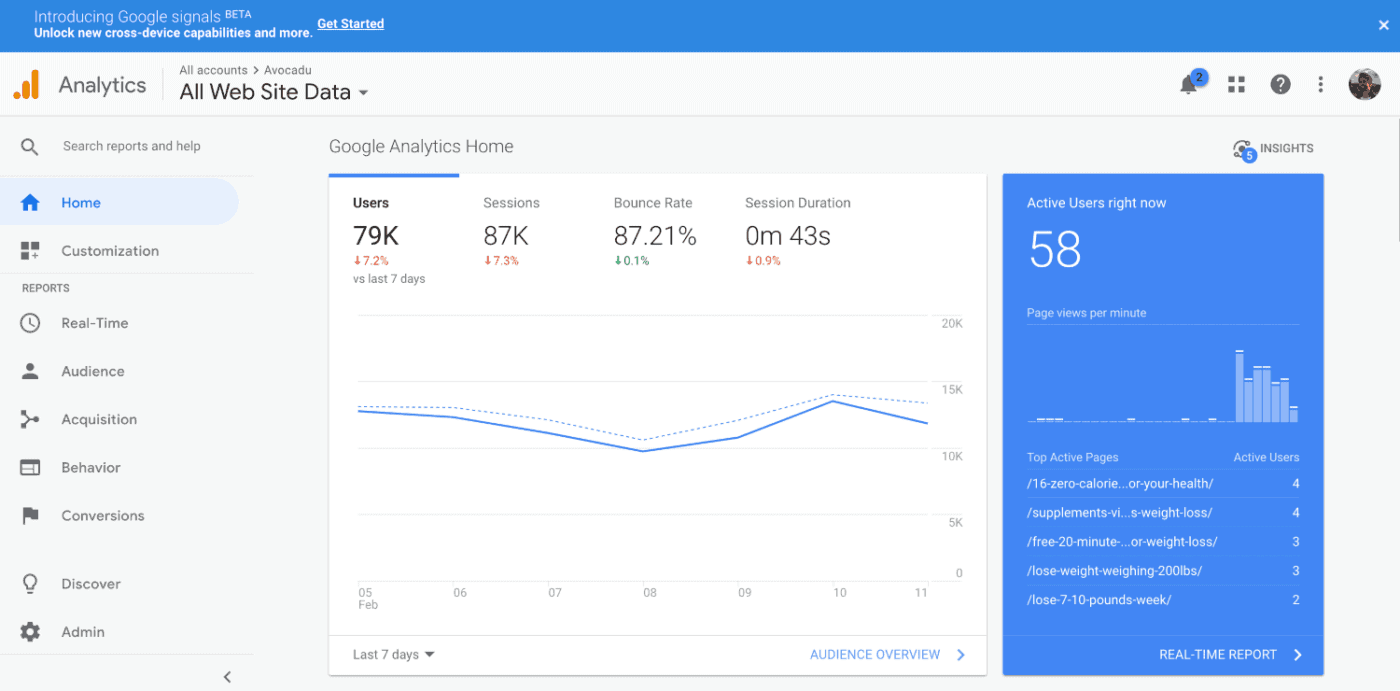
You’ve probably heard of Google Analytics before, but if you’re unfamiliar with the features, here is a 30,000-foot overview of what kind of information it can show you:
- How many views your blog is getting per day
- What social media platforms or search engines those site visitors are coming from
- Where in the world they are viewing your website from
- What time they are accessing your website as well
- How long they are spending on your pages
- And more!
This is what the Google Analytics account dashboard looks like:
You can access it anytime by going to their website, but there is also a free WordPress plugin by MonsterInsights that lets you view the data right in your WordPress dashboard:
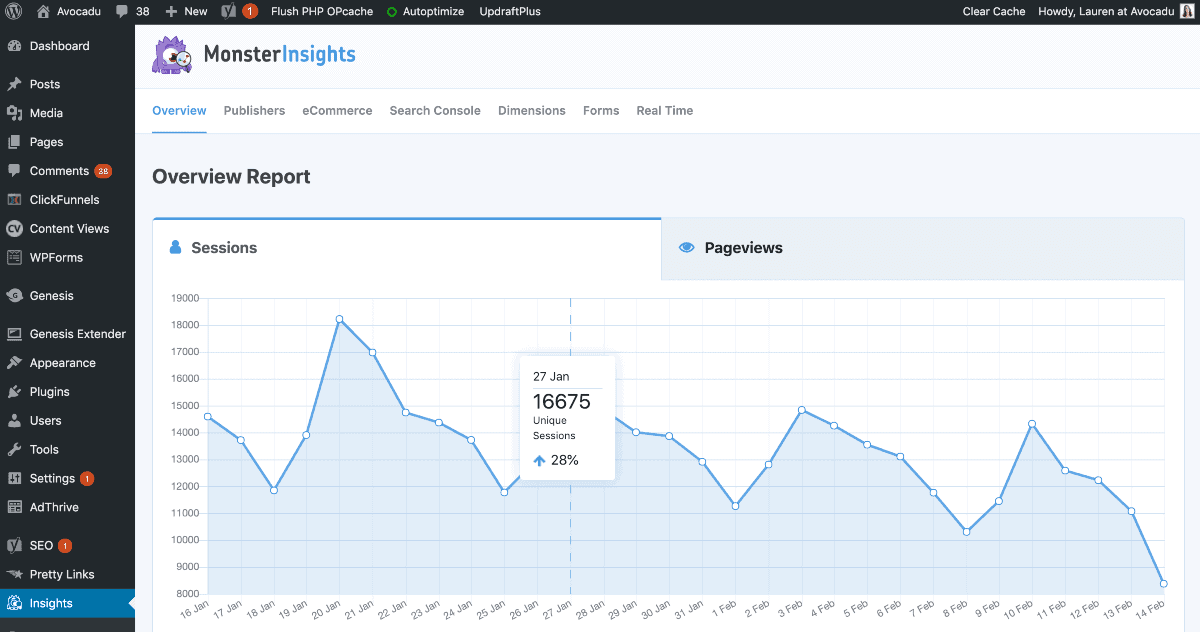
And there are even more details if you scroll down:
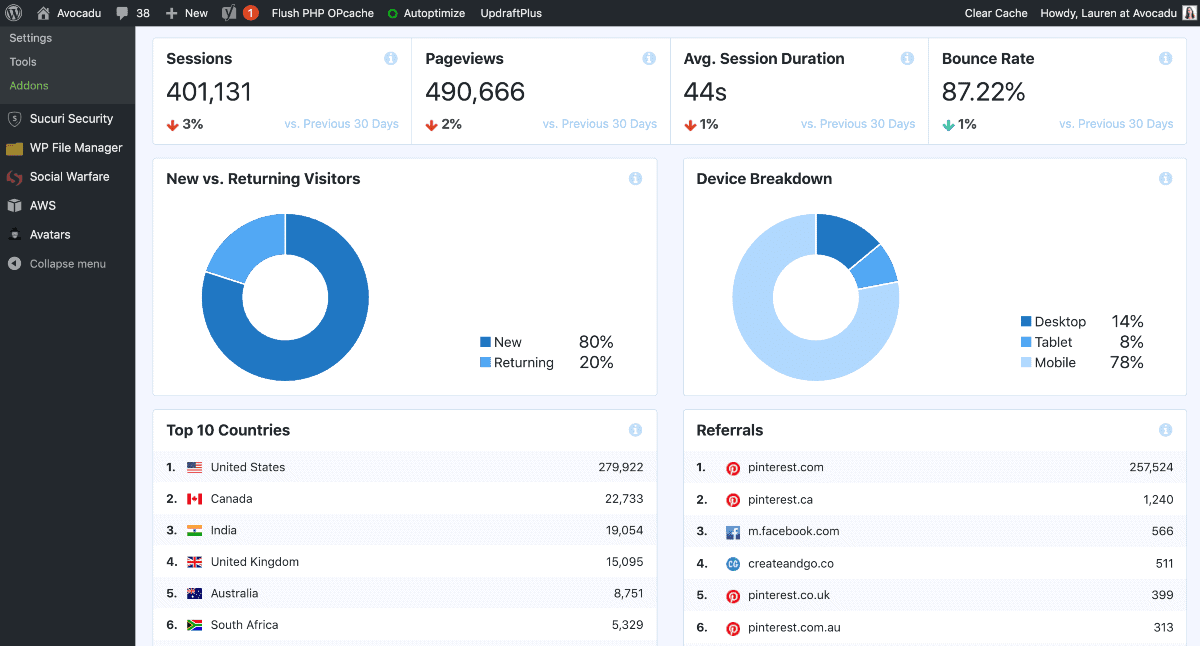
Google Analytics is the most accurate way to track your blog traffic and it should be the only metric you are using.
Other plugins like JetPack are bloated and can slow down your site. Some bloggers also pay too much attention to Pinterest Analytics, and these are often not as accurate as GA.
Key Features
- Real-time tracking and analytics for site visitors
- Detailed reports on page views, site visitors, referrers, conversion rate, etc.
- Integration with popular analytics plugins to track user behavior on your website
- Customize the data displayed in the dashboard
- Easily monitor goals and KPIs
- Integration with other Google services, such as AdWords and Tag Manager
- Ability to generate custom reports for better analysis
12. Kit (Email Collection)
Okay, so this one is only necessary if you have and use Kit, which is our #1 recommendation to collect and send emails on your blog.
The Kit plugin for WordPress allows you to embed simple opt-in forms that capture leads with a simple shortcode.
These forms are created within the Kit software, and then you use the plugin to easily add them to your website. If you use a different email marketing service, you might want to check if they have a similar plugin.
Kit, like most email marketing services, does cost a fee, but the plugin is free. You just need an active Kit subscription to use it.
If you don’t have Kit and want to try them out, you can start with the free plan.
Key Features
- Integration with popular email marketing services
- Real-time notifications when a new subscriber has signed up
- Built-in opt-in forms for quickly collecting emails
- Ability to customize the look and feel of opt-in forms
- Integration with popular page builders for creating custom newsletter templates
- Option to segment subscribers into groups and send tailored messages
13. Pretty Links (Affiliate Links)
If you have affiliate links anywhere on your blog, you need this plugin.
Before I downloaded this plugin, I would have to look up my affiliate links in a spreadsheet every time I needed one of them.
Most affiliate links have random strings of letters and numbers behind them that make it impossible to remember.
Now, I remember 99% of my affiliate links because I use a plugin to create links that look “prettier” and are easier to remember.
The Pretty Links plugin allows you to create clean domain links to redirect or cloak other links (like affiliate links) rather than using TinyURL or bitly, which look spammy and are sometimes not allowed.
Here’s an example:
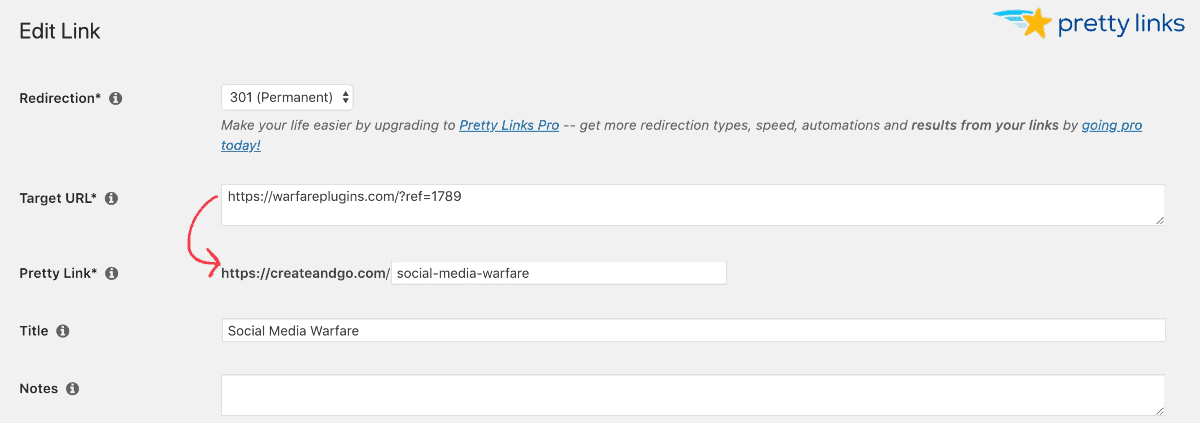
My pretty links are generally pretty simple and easy to remember, like these:
- https://createandgo.com/recommends/convertkit/
- https://createandgo.com/recommends/divi/
- https://createandgo.com/recommends/bluehost/
There are also advanced options to add “No follow” tags to your pretty links.

Using “No follow” tells Google to essentially ignore your affiliate links.
This is important because too many affiliate links can come off as spammy and signal to Google that your content may not be authentic and trustworthy.
It also gives your other internal links to your site more “link juice,” which helps with SEO.
Pretty Links is essential if affiliate marketing is a big part of your monetization strategy!
There is a premium version of this plugin available, but the free version should be sufficient for most WordPress users.
Key Features
- Easily shorten and customize affiliate links
- Integrate with popular link-building tools such as Ahrefs, Majestic SEO, and Moz
- Built-in click tracking to monitor user engagement on your links
- Automatic notification when someone clicks on a link
- Ability to cloak links for improved security against scraping bots
- Option to redirect users based on their location or device
- Integration with popular affiliate networks for easy setup and tracking.
14. Titan Anti-Spam (Anti-Spam)

If spam is a problem on your blog, congratulations! Your blog is popular enough that people are targeting it for spam.
Okay yeah, that sucks. The worst part is that spammers use bots to automatically send comments and login attacks to your website. No one has time for this.
Titan Anti-Spam is a WordPress security plugin that fights spam, obviously. But it does a lot more than just filter spam comments and block bad login attempts.
It also contains a security scanner that will help detect vulnerabilities in your site:
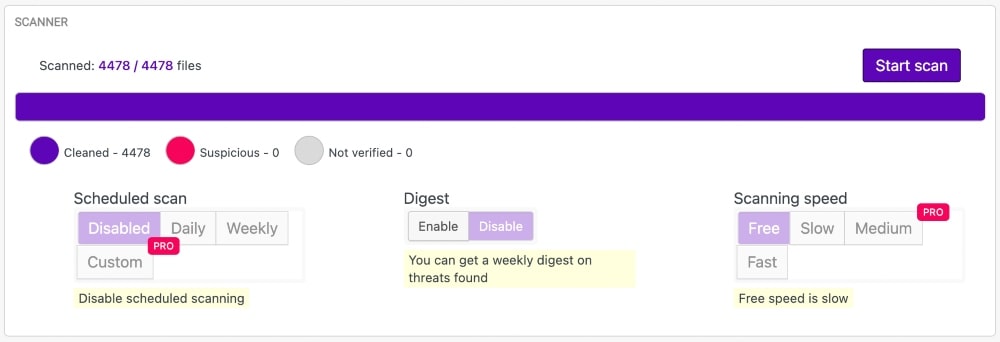
This is a must-have plugin for spam and security and the best part is, it’s free!
There is a premium version available, but the free version has a lot of features that will be enough for most users.
Key Features
- Advanced anti-spam algorithms to detect and block spam comments
- Ability to easily blacklist users or IP addresses
- Integration with popular comment plugins, such as Disqus and WordPress Comments
- Option to add a captcha for added security against spam
- Real-time notifications when a new comment is detected
- Support for customizable filters to prevent malicious links and content
15. UpdraftPlus (Content Backups)
As I explained above regarding the caching plugin, WordPress sites are FULL of files and coding. That coding can also break.
When you update plugins, theme files, or other software, it can cause conflicts in the coding of your website that can cause it to shut down.
Poof. Gone.
That’s IF you don’t have a backup of your files. Some hosting companies perform backups for you but you are generally limited for space and can’t rely 100% on these ‘routine’ backups.
UpdraftPlus is a backup plugin that automatically performs backups of your website, so you can go to sleep at night with the peace of mind that your business won’t implode overnight.
You can set the backups to occur as frequently or as infrequently as you want and where you want to store the backups:
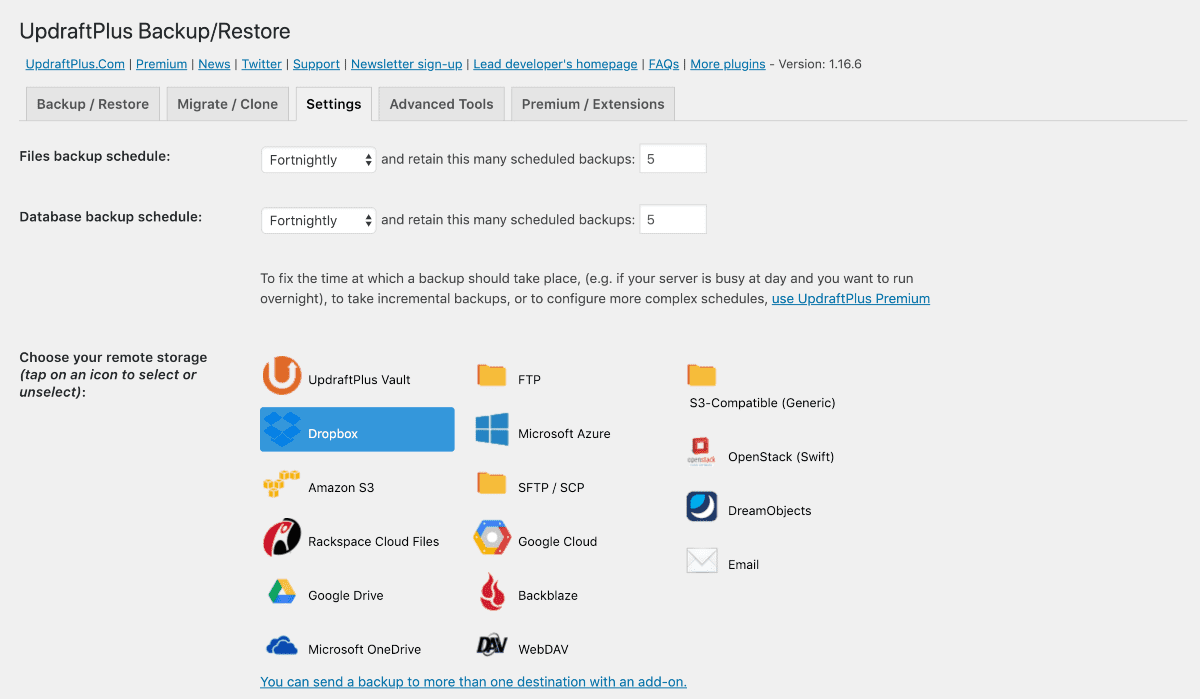
I am personally partial to Google Drive because I already pay for their email service anyway, which includes Drive space. But Dropbox and Amazon S3 are also great options.
UpdraftPlus has both a free version and a premium version, so you can decide what you need for your blog, but this plugin is absolutely essential!
Key Features
- Automatic content backups to ensure the safekeeping of data
- Option to backup to popular cloud storage solutions, such as Dropbox and Google Drive
- Easily restore previously backed-up versions of your site
- Integration with popular plugins, such as WooCommerce and Gravity Forms
- Schedule backups for a specified time frame
- Ability to easily clone sites for testing purposes
- Option to automate the backup process for improved security
16. Wordfence Security (Security)
Steering the conversation back to spammers… The bigger your blog becomes, the bigger the target on your back for spammers, hackers, you name it.
Your blog is a business, which makes it valuable, and makes people want to steal from you. You’ve worked hard for it but some others [sadly] don’t want to.
If someone gains access to your blog, they can steal your information, delete it, and wreak havoc on your hard-earned success.
Wordfence Security is a security plugin that includes a firewall and malware scanner to protect your WordPress blog from external threats.
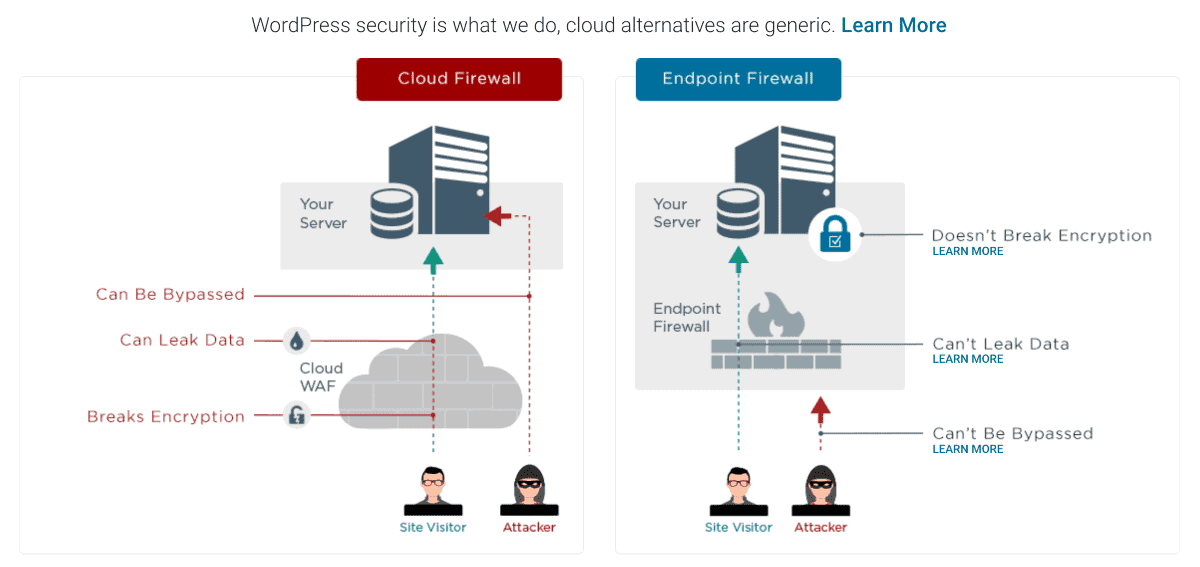
It will block malicious attempts to log in to your site and even show you where the IP addresses are coming from and what credentials people are using to try to log in.
The security of your blog is something you should never take too lightly. Make sure that you are also using a secure password to log in to your WordPress site.
Using a password manager like LastPass can also help to keep your passwords more secure.
The paid version of this plugin isn’t necessary unless you need a high level of configuration and support.
Key Features
- Advanced security algorithms to detect malware and malicious content
- Real-time notifications when a threat is detected
- Integration with popular security plugins, such as iThemes Security and Sucuri
- Firewall protection against common threats
- Option to customize the scan settings for improved performance
- Two-factor authentication (2FA) for enhanced user security
17. Broken Link Checker (Link Checks)
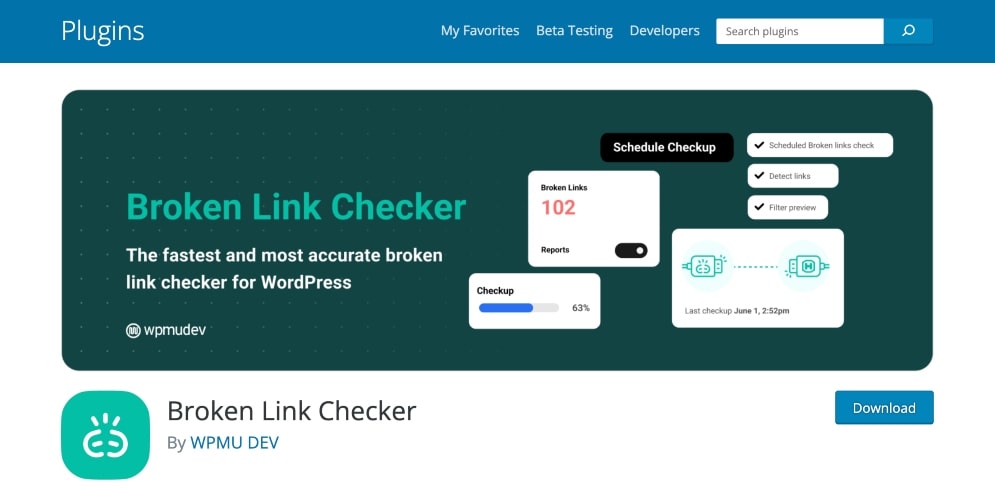
Having broken links on your blog doesn’t just look unprofessional; it can also lead to a significant loss in traffic and readers.
Broken Link Checker is a free plugin that can detect broken links in all posts, pages, comments, and custom fields. It will also check for missing images and redirects as well.
It can also help keep your blog organized by preventing the creation of multiple links to the same URL and editing existing links with a single click. Plus, it sends out timely notifications whenever a broken link is detected or when a link needs updating.
Broken Link Checker is one of the best free WordPress plugins that will save you time, improve SEO scores and make sure all website visitors enjoy a smooth experience while navigating through your website.
Key Features
- Quickly detect broken links in posts, pages, comments, and custom fields
- Prevent the creation of multiple links to the same URL
- Edit existing links with a single click
- Receive timely notifications when broken links are detected or need updating
- Automatically repair most link errors while preserving link anchor text and attributes
18. WooCommerce (eCommerce)

WooCommerce is the best WordPress eCommerce plugin for anyone wanting to run an eCommerce store on their WordPress website.
You can create product catalogs, manage orders and inventory, accept payments with popular payment gateways such as PayPal and Stripe, and have your store up and running in no time.
With WooCommerce, you can also customize the look and feel of your store to match your blog’s branding.
It also integrates with popular online marketplaces like Amazon and eBay for easy cross-promotion of products.
WooCommerce is one of the best free WordPress plugins to start selling products or services on your blog and make money from it.
It also has excellent customer support if you ever run into any issues while setting up your store.
Key Features
- Easy setup and customization with themes, widgets, and plugins
- Flexible payment options, including all major credit cards, PayPal, Apple Pay, Google Pay, and Amazon Pay
- Comprehensive reporting and powerful analytics tools to monitor sales and track customer activity
- Integrated taxes and shipping costs calculations to ensure accuracy
- User-friendly interface for managing products, orders, customers, and more
- Secure checkout process with SSL encryption
- Advanced coupon and discount code support
- Full inventory management system to help you keep track of stock levels
- Integration with popular tools like MailChimp, Zapier, and Google Analytics
19. MemberPress (Membership)

MemberPress is a great plugin for creating membership areas on your WordPress website.
It allows you to easily set up subscription levels, accept payments from members, and manage access privileges.
You can also create private content areas for members only, design custom forms to capture leads and use the built-in analytics tools to track user engagement and activity.
MemberPress is one of the best WordPress plugins for monetizing your blog content and providing your readers with exclusive access to content that’s only available to members.
It also integrates with popular payment gateways like PayPal, Stripe, and Apple Pay so you can start accepting payments without any hassles.
Key Features
- Automated onboarding with automated emails
- Flexible membership levels tailored to your users’ needs
- Customizable signup forms to collect the information you need from your members
- Easy content dripping with robust scheduling functionality
- Seamless integration of payment gateways and shopping carts
- Powerful analytics to track membership engagement and growth
- Comprehensive member management tools for easy access to all user data
- Flexible user roles and permissions for complete control over who sees what
- Member-only content, forums, downloads, coupons, and more
20. PushEngage (Notifications)
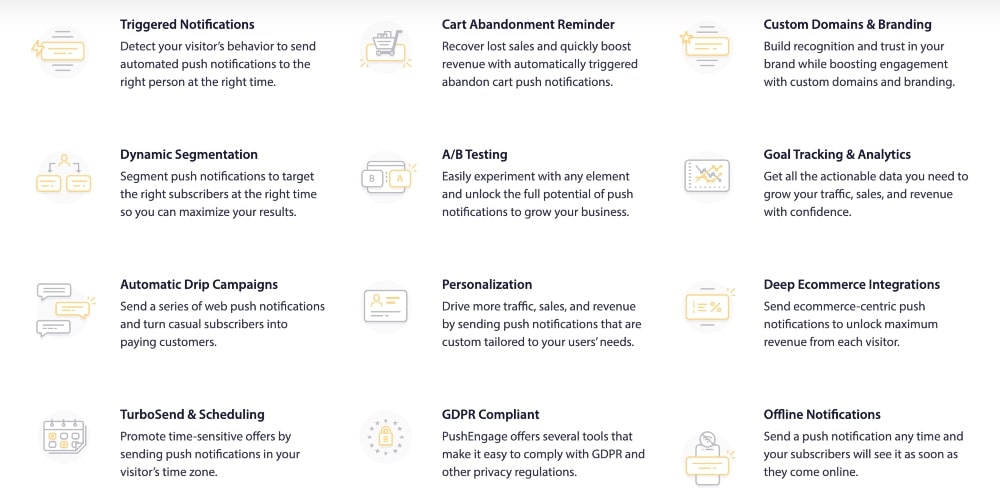
PushEngage is a free plugin (with pro plans available) that can help increase engagement and grow your blog subscriber list.
It allows you to send browser push notifications to website visitors when new content is published, or when there are updates about your blog.
You can also add a subscription widget to your blog so that readers can easily sign up for notifications and get notified whenever new content is published.
PushEngage is an easy-to-use plugin that will help you keep your readers engaged without having to rely on email marketing or other social media platforms.
Key Features
- Automated notifications for events like post updates, product launches, and more
- Targeted the right audience with segmentation options
- Integrations with popular platforms like WordPress, Shopify, and more
- Customizable templates for web notifications
- A/B testing to find the most effective messaging and timing
- Scheduling notifications based on user preferences
- Easy-to-use analytics suite to measure success
- Automatically re-engage with users through browser notifications
- Advanced segmentation features to finely target the right users
21. Shared Counts (Social Sharing)
Shared Counts is one of the best WordPress plugins for social media sharing.
It allows you to add social sharing buttons to your blog posts so that readers can easily share them on their favorite platforms.

You can also see how many shares each post has gotten and track its performance over time. Plus, it integrates with popular analytics tools like Google Analytics to help you better understand your audience.
The plugin also has a number of customization options, so you can easily match the social sharing buttons with your blog’s branding.
Shared Counts is one of the best free WordPress plugins for any blog looking to increase engagement and grow its readership.
Key Features
- Track engagement across various social media platforms
- Share counts are automatically updated on a regular basis
- Customizable share buttons and tracking code
- View detailed reports of social media sharing activity
- Automatically share content to multiple social networks
- Option to show total share count or separate network counts
- Ability to exclude certain referrals from the reported stats
- Support for various post types such as pages, posts, and custom post types
- Easy integration with themes and other plugins
22. WPCode (Code Snippets)
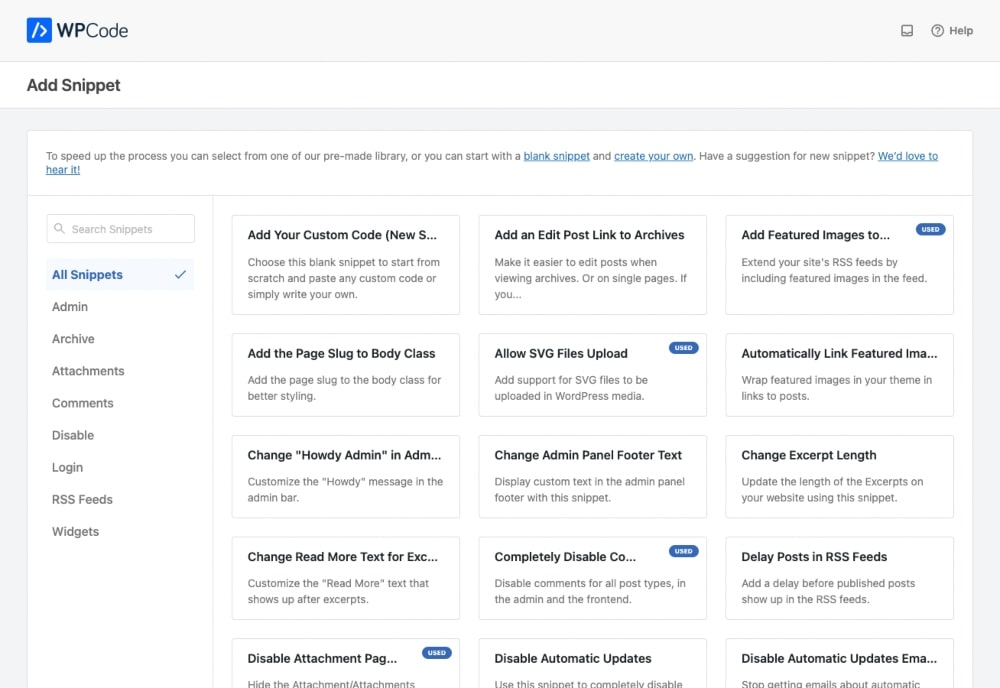
WPCode is a great WordPress code for the less tech-savvy, or shall I just say non-coder, bloggers out there. It allows you to easily create, manage and store code snippets for your website.
It provides syntax highlighting for HTML, CSS, JavaScript, PHP, and other languages. It also features an auto-complete feature which can help make writing code easier and faster.
Sometimes, you might need to add a little extra coding to your website from time to time to make a change that your WordPress theme doesn’t provide. With WPCode, you can quickly create, access, and use any snippet of code with just a few clicks.
You can also categorize snippets for easier navigation and even create templates to save time when creating multiple snippets. Plus, you can easily share your code snippets with others in the community or use them across multiple websites.
Key Features
- Easy to use with an intuitive interface
- Comprehensive analytics with real-time insights
- Access to a library of WordPress plugins and themes
- Ability to customize code snippets for your site’s unique requirements
- Automated debugging and coding assistance
- Support for HTML, CSS, JavaScript, PHP, and other programming languages
- Advanced security features to protect against malicious attacks and unauthorized access
- Comprehensive documentation and tutorials to help you get up and running quickly
- Community of developers on the WPCode forum available to answer questions
23. Elementor (Page Builder)

Elementor is a page builder plugin that allows you to easily create beautiful, customizable pages without having to write a single line of code.
You can choose from over 100 pre-built templates, customize existing designs, or even design your own page from scratch.
The drag-and-drop editor makes it easy to quickly create beautiful websites that look great on any device. You can also add custom animations, effects, and widgets to make your pages stand out.
Elementor is the best free WordPress plugin for bloggers who want to build professional-looking websites without any coding skills. You can use it with most blog themes for added customization.
Key Features
- Easy-to-use, drag-and-drop page editor
- Live editing to change your designs in real-time
- Responsive design that look great on any device
- Over 300+ designer-made templates that you can customize
- Advanced design features such as parallax scrolling, animated effects, and more
- Close integration with popular WordPress plugins for creating a seamless experience
- Comprehensive support and resources to help you make the most of Elementor
- Compatibility with all major themes, so you can create unique designs for any project
- SEO optimization tools to ensure that your pages rank highly in search engine results
24. Fixed Widget (Widget Manager)
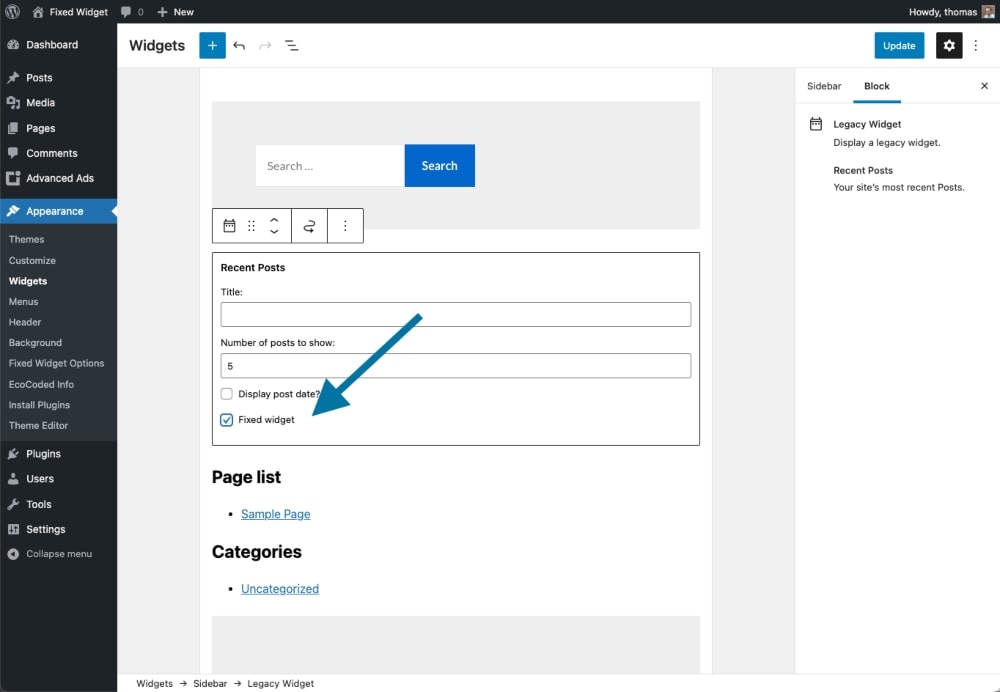
Fixed Widget makes managing your blog’s widgets easy and efficient. It allows you to create sticky widgets so they will stay visible on the same spot no matter how far down a page readers scroll.
You can also easily rearrange, hide or delete widgets from your sidebar without having to go into the widget settings. Plus, Sticky Widget Plus integrates with popular WordPress themes so you can customize your widgets to match the look and feel of your blog.
Key Features
- Mobile-friendly design and responsive layout
- Lightweight codebase for fast loading
- Powerful customization options to get the exact look and feel you want
- Advanced features like scheduling, custom post types, and more
- Easy installation & setup – no coding required!
- Comprehensive documentation and customer support
25. Related Posts (Widgets)
Related Posts is a free plugin that helps you display related posts in the sidebar or at the bottom of your blog posts.
You can easily customize the look and feel of these related posts, and you can even choose which categories or tags to use for sorting them. It also allows you to control the number of related posts that are displayed and add custom labels for each post.
Related Posts is great for increasing engagement on your WordPress website as it encourages readers to explore more content after they’ve finished reading a post.
It’s also great for SEO purposes, as it increases internal links on your blog.
Key Features
- Automatically detect and add related posts in your content
- Multiple options for styling and placement of featured images
- Create “related lists” to quickly display relevant posts on any page or post
- Keep website visitors engaged by adding a “Contextual Related Posts” section to your content
- Quickly and easily add bylines or other post-specific information for each post in the list
- Easily hide entire sections of related posts with a single click
- Show multiple posts from one category, author, or tag in a single list view
- Automatically display related posts in the sidebar or footer on single post pages
- Advanced tools for sorting, filtering, and displaying related content
26. Media Cleaner (Media Management)
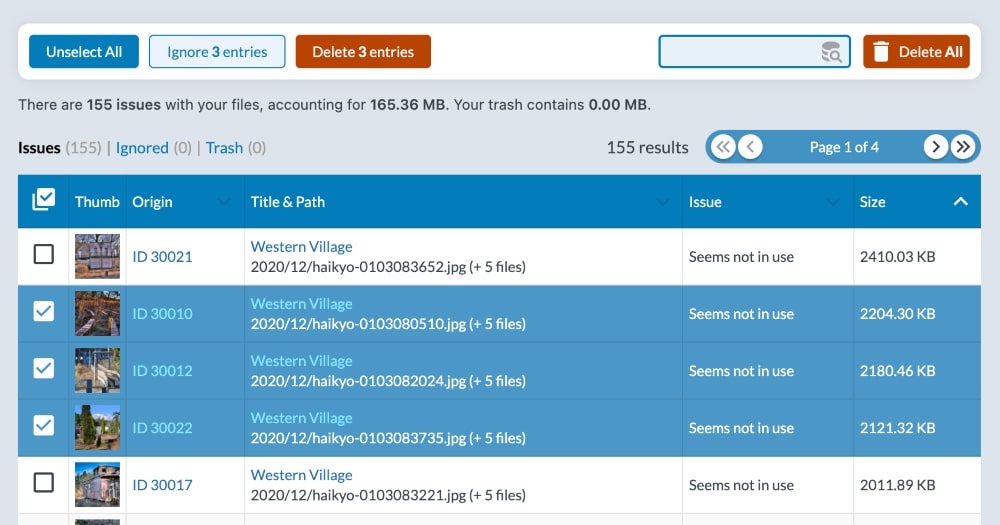
Media Cleaner is a plugin that helps you keep your WordPress media library organized and clutter-free. It allows you to easily find and delete unused images, videos, and other media files from your blog.
You can also set up automated rules for deleting certain types of files or queries to quickly search for specific files.
This WordPress plugin also provides detailed reports and analytics so you can track and view your current media library usage.
Media Cleaner is an essential plugin for anyone who wants to keep their blog’s media library organized and free of clutter. Plus, it helps improve site performance by removing any unnecessary files from your server.
Key Features
- Automatically scans your WordPress library for unused files
- Prevents broken links by detecting orphaned files and providing an easy way to delete them from the media library
- Bulk deletion option lets you delete multiple unwanted files in one action
- Compatible with most WordPress themes and plugins
- Simple user interface that makes it easy to use and understand
- Supports popular file formats like images, audio, video, documents, etc.
- Easy to install and setup within minutes
27. SeedProd (Landing Pages)

SeedProd is one of the best WordPress plugins for creating landing pages to capture leads and grow your blog’s readership. It features a drag-and-drop builder that makes it easy to create beautiful, responsive landing pages without any coding skills.
You can also customize templates, add forms, track analytics, and set up A/B tests for optimal performance.
Plus, it integrates with popular email marketing tools like MailChimp and Constant Contact to help you quickly capture leads from your landing pages.
You can also use this builder plugin to create sales and opt-in pages, thank you pages, and more.
Key Features
- Drag-and-drop page builder with responsiveness for mobile devices
- Popup builder to boost engagement
- A/B testing to maximize conversions
- Exit intent technology (AKA “exit-intent popups”)
- Integrations with popular email marketing services like MailChimp, Constant Contact, and more
- Ability to customize fonts, colors, and styles
- Social Media integration for easier sharing
28. Akismet (Spam Protection)
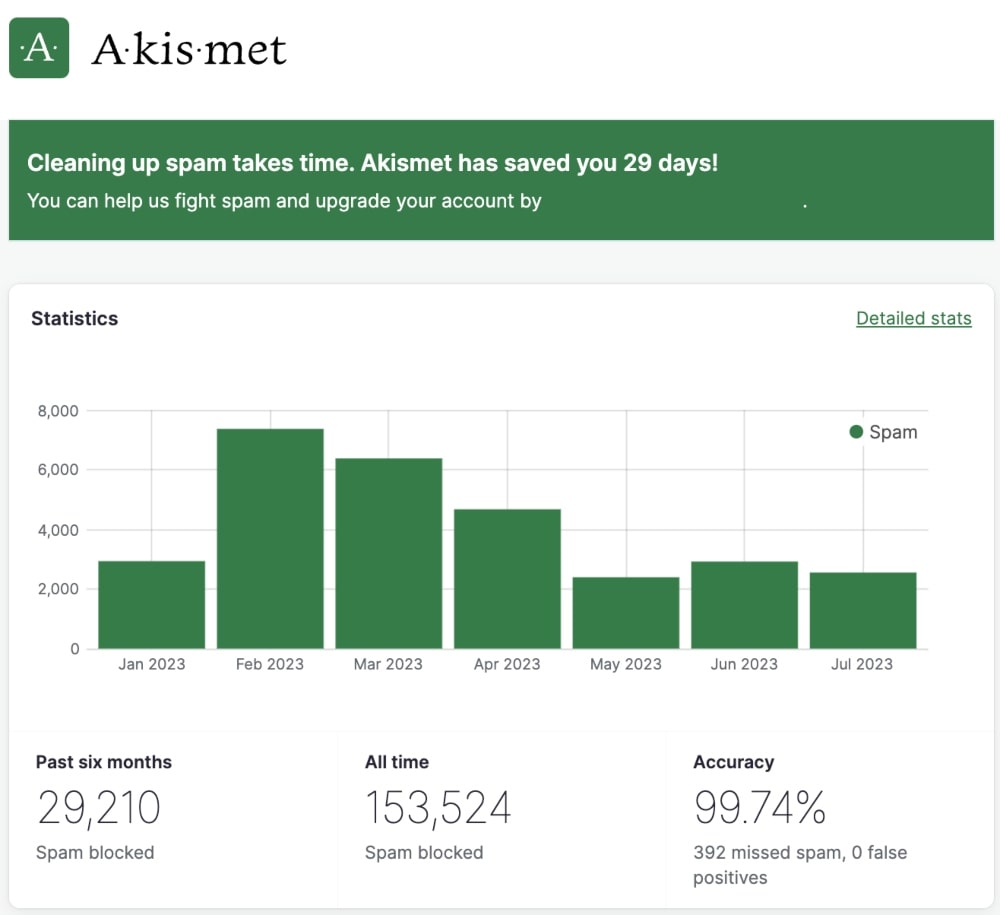
Akismet is a must-have WordPress plugin for any blog looking to protect against comment spam. It uses advanced algorithms to detect and filter out malicious comments, protecting your blog from hackers and spammers.
Plus, it integrates with popular contact form plugins like Gravity Forms or Ninja Forms so you can automatically protect your forms as well.
Akismet is also free for personal use, so you can easily get started protecting your blog without any added costs.
It’s an essential WordPress plugin for any blog looking to keep malicious comments away and protect their readers from spam.
Key Features
- Automatically checks all comments and filters out spam
- Blocks malicious code that could harm your website
- Helps you keep your website clean and secure
- Automatically checks to make sure all comments are valid
- Monitors your website activity for suspicious behavior
- Notifies you if any suspicious activity is detected
- Easy to install and configure
- Compatible with most WordPress themes and plugins
29. Asset CleanUp (Page Speed)
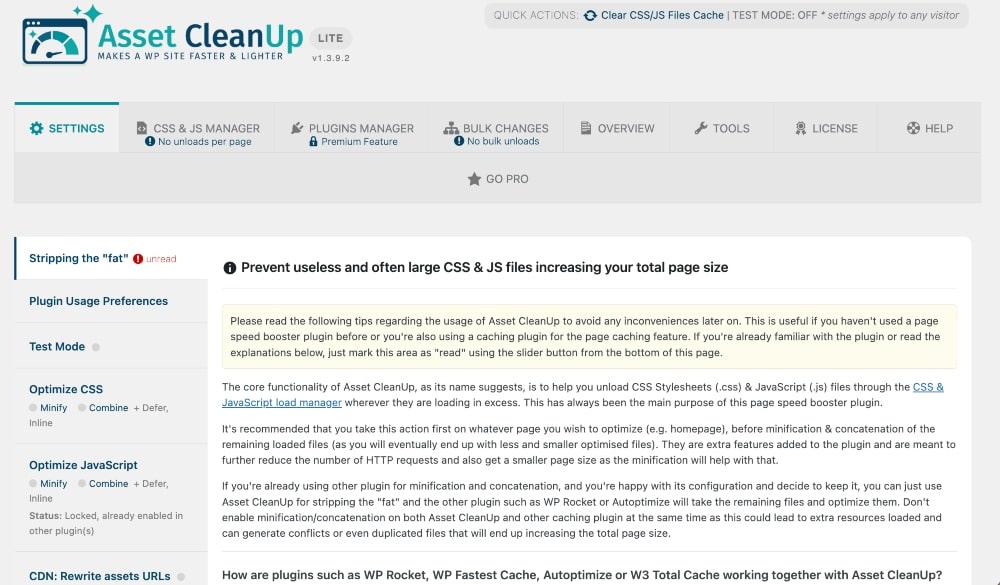
Asset CleanUp is a great WordPress plugin for improving your blog’s page speed and optimizing it for SEO. It allows you to easily unload scripts and stylesheets from pages that don’t need them, as well as minify the HTML code on your website.
You can also use it to remove query strings, clean up fonts, combine files into one, add defer attributes to scripts, and more.
Asset CleanUp is an essential WordPress plugin for any blog looking to improve page speed and SEO performance.
Plus, it’s easy to use and makes optimizing your blog a breeze.
Key Features
- Identify and reduce the number of HTTP requests to your website
- Unload unused plugins or assets on specific pages/posts/URLs
- Set a global configuration and apply it across all posts, pages, etc.
- Minify HTML, JavaScript, and CSS files to improve page loading speed
- Combine Google Fonts and generate preloads for custom fonts for faster font delivery
- Manage asset groups, such as Google Maps, Font Awesome icons, and other external resources
- Create your own exclusions of assets that should never be removed
30. Lazy Blocks (Content Blocks)
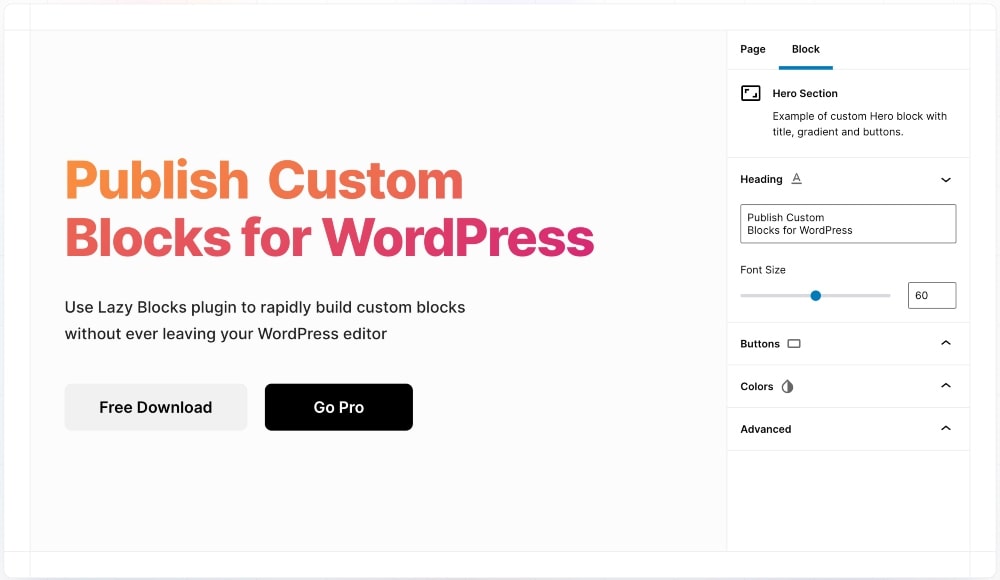
Lazy Blocks is a powerful WordPress plugin that allows you to easily create custom blocks for your pages and posts. It features an intuitive drag-and-drop block builder with dozens of elements to choose from, as well as custom templates and styles.
Plus, you can easily add dynamic content like images, galleries, and videos to your custom blocks.
This WordPress plugin is great for bloggers who want to create beautiful, customized pages without needing coding skills.
It’s also an essential plugin for anyone looking to create their own page templates with unique designs.
Lazy Blocks is one of the best WordPress plugins when it comes to creating custom blocks and dynamic content for your WordPress website.
Key Features
- Drag-and-drop visual editor
- Save time by reusing blocks on multiple pages or posts
- Create custom blocks for any content type – including videos, images, and more
- Add dynamic fields to your blocks with easy-to-use Options pane
- Check out the prebuilt library of templates and blocks
- Automatically generate code for custom Gutenberg blocks
31. Lightweight Accordion (Blog Content)
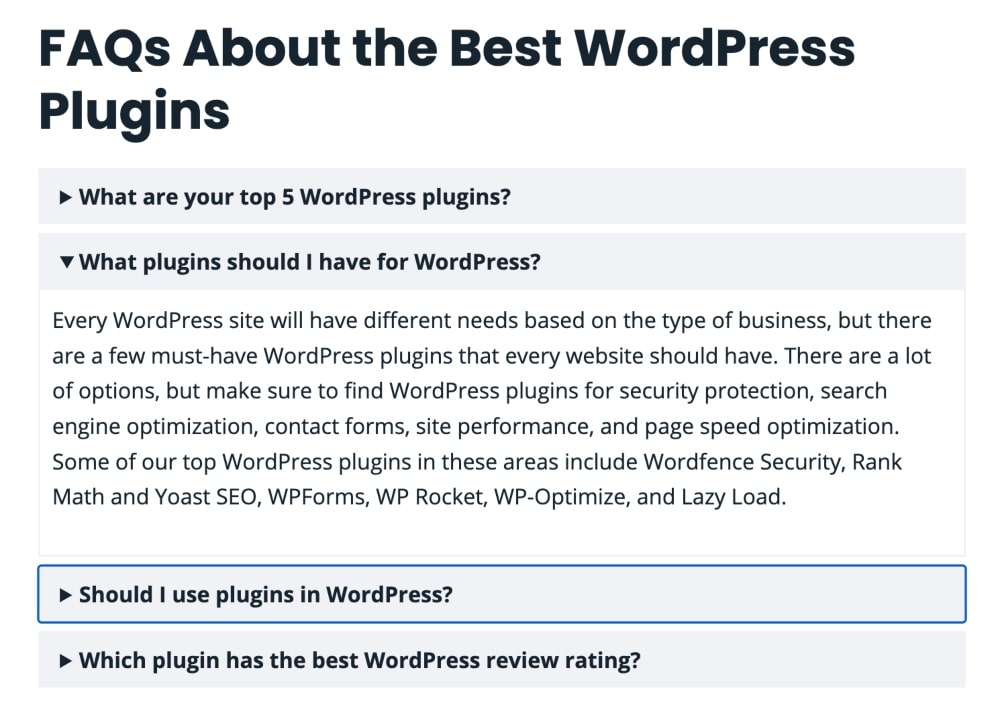
Lightweight Accordion is a free plugin that allows you to easily add customizable accordions to your WordPress site. This plugin makes it simple to create beautiful and responsive accordions with multiple options like open/close, animation, styling, and icons.
Plus, Lightweight Accordion integrates with popular page builders for added customization.
It’s great for creating FAQ sections, pricing tables, and other types of content blocks that require an accordion structure.
Lightweight Accordion is the best WordPress plugin for bloggers who want to add collapsible content to their pages without coding knowledge.
Key Features
- Fully responsive on all devices
- Customizable options including colors, font size, and more
- SEO optimized
- Supports shortcodes for further customization
- Offers smooth transitions with a modern design
- Translation ready – available in multiple languages
- Compatible with WooCommerce for improved user experience
32. Lucky WP Table of Contents
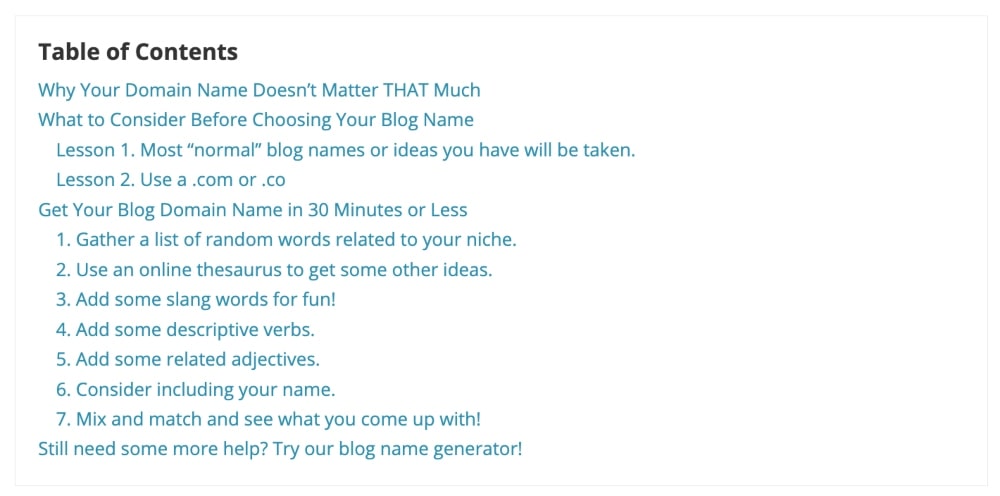
Lucky WP Table of Contents is a WordPress plugin that helps you create a clean, organized table of contents for your blog posts. It allows you to easily customize the look and feel of your table of contents and add links to specific headings so readers can quickly navigate around your post.
It also supports multiple levels of headings and allows you to add or hide certain elements from each table of contents.
Adding a table of contents to your blog posts will help keep readers stay engaged and spend more time on your pages. It also helps improve SEO by allowing Google to easily index all the headings on your page.
Key Features
- Automatically generates a table of contents for pages and posts
- Options to customize font size, color, border, and more
- Assign different levels of headings for the table of contents
- Support for both single- and multi-page content
- Advanced settings for customizing how the table of contents looks and behaves
- Ability to set depth level for nested headings
- Easy setup with no coding required
- Tooltips included on table of contents items
How to Install WordPress Plugins
Okay, now that we’ve finished our must-have WordPress plugins, let’s quickly talk about how to install a WordPress plugin:
- Using the search feature
- Uploading the plugin directly
Both methods only take a minute but note that not all plugins are found and able to be installed via search.
Installing Plugins Using the Search Feature
You can use the search feature in the WordPress plugin area to search for popular plugins or specific plugins based on keywords.
To get to the plugins area, simply click on the “Plugins” link on the left menu of the WordPress dashboard. Then click the “Add New” button.
You can type in the name of one of these best plugins for WordPress (i.e. Fancier Author Box) or something generic like “author box.”
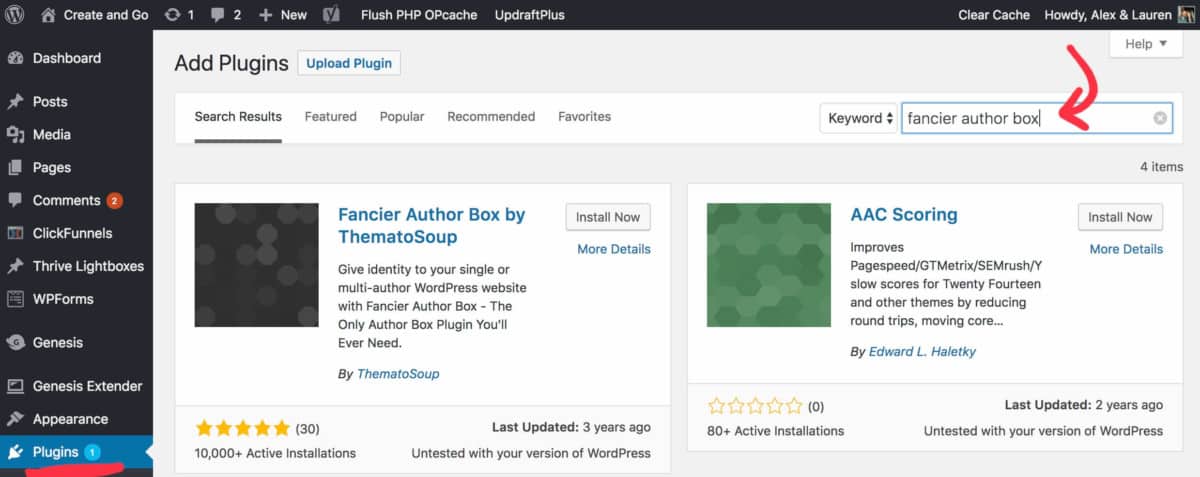
To install a plugin, click the “Install Now” button next to the plugin. Make sure to activate the plugin after installing it.
If the WordPress plugin you are looking for isn’t turning up in your search results, you’ll probably have to upload it manually.
Uploading Plugins to WordPress
Some plugins must be manually uploaded to WordPress. This is more common with paid plugins.
Before uploading a plugin to WordPress, you must first download it from the website (after purchasing, if it’s a paid plugin). The download should be in a zip file.
Make sure to leave the downloaded plugin file as a zip file because that is the required format for uploading it to WordPress.
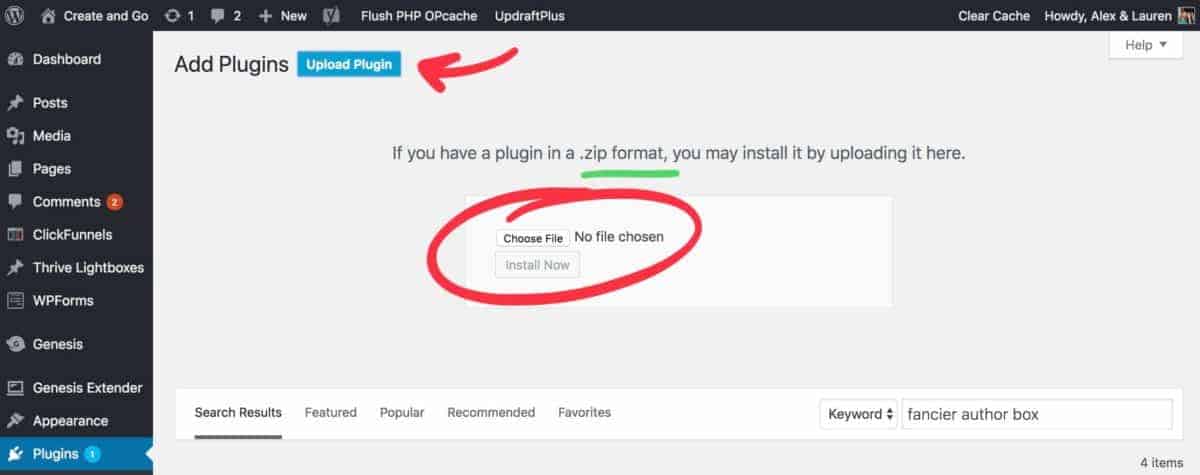
After uploading, click to install and activate the plugin.
FAQs About the Best WordPress Plugins
Key Takeaways for the Best Plugins for WordPress
These are just some of the best WordPress plugins available to help customize your site and boost its overall performance.
There’s a wide selection of free and premium plugins that can do everything from improving SEO to speeding up page loading times.
We recommend choosing plugins based on your website’s needs, such as security protection, search engine optimization, contact forms, site performance, and page speed optimization.
Although it may seem intimidating at first, once you start using the right plugins for your site there’s no limit to what you can accomplish!
Hi, I’m a total newbie, and I’m loving the videos, articles, help etc – great job!!
I do have a question- Would you suggest I try and install these plug ins first, or start off with your beginner’s course? I am overwhelmed, only because I’m new to this, and I’m doing it all on my own- So, I basically need to know I’m starting off on the right foot. I do have my own website ( I’ve not launched it as yet)- managed to at least set that up with your help- the video/tutorial I came across on Youtube, but that’s about it at this stage. So, my question is – attempt these plugins, or course first?
Thanks “Create and Go”! 🙂
Hey Sonja, you do not need to install plugins before taking our beginner course. We have included a lesson on installing plugins 🙂
Hey Guys,
Thanks for the reply, much appreciated!
I’m progressing through the ‘Launch Your Blog Biz” course, which I’m finding very helpful so far! Early days, but I’m enjoying what this course is about, thanks again, you’re a GREAT help 😉
So great to hear you are enjoying the course!!
Thank you so much for ALL this useful information. The only plug in I had issues with was with Complianz. I’m new to blogging and didn’t understand the lingo. I ended up deleting it.
Glad the info helped! Sometimes plugins will conflict with other plugins or your chosen theme. The good news is, there are always alternatives you can try 🙂
Very good information but Fancier Author Box has not updated for 6 years. Is there a similar alternative?
Hey Tonya, we are looking into that now and hope to have a new recommendation soon 🙂
Wow..!!
Its amazing information.
I get a good amount of information on Word Press plug-in.
Thanks..!!
You are so welcome!
Great article! It was very useful. Thanks
Thanks!