Want to know which of the best blogging tools we have personally used to grow and scale our online businesses to six figures? We’ve made a lot of mistakes along the way, and learned a lot from them.
I think I have tried every tool, software, gimmick, webinar, launch, and any other magic pill you can think of. I know that I’ve tried at least 5 different email marketing services along the way.
There are so many free blogging tools and paid ones that it can be challenging to know what to invest in and when to upgrade.
The software that we use is also subject to change, and I revisit this article at least once a year to make sure it’s as up-to-date as possible.
Every one of these best blogging tools is one that we personally use or have used in the past. Many come straight from our course and there are some recommendations for both beginners and anyone who has been in the game for a while.
Some of the blogging tools mentioned are paid tools, but I have also tried to provide a free option whenever possible.
What are the Best Blogging Tools?
The very first blogging tools that we are going to discuss are the ones that make up the foundation of your blog — the ones that you should start with.
Without a great blog hosting plan and platform to run your blog on, you’ll never grow as quickly or reach the level of success that you should with the right tools.
1. Bluehost (Web Hosting)

The first step in building your foundation is choosing the best blogging platform to run your blog on. That would be WordPress, and with that, you should have the right hosting plan.
Bluehost is one of the best blogging tools that you can get started with. It’s our #1 recommendation for getting started.
I’ve tried quite a few hosting companies over the years, including Siteground and Hostinger, which are the biggest competitors.
Bluehost has great customer service and they are one of the most affordable companies to start off with.
You can start your blog for as low as $1.99/month (only through our partner link).
They are also what we personally used for the first two years to take two different blogs to six figures.
Related: How to Start a Blog (Best Beginners Step-By-Step Guide)
Once you’ve set up the foundation of your blog, the next blogging tools you should look into are related to the design and theme of your blog or website.
2. Divi (WordPress Theme)

As a beginner blogger, the two most important factors in choosing a great blog theme include:
- User-friendliness — being able to learn the software quickly and not spend hours making the smallest of changes
- Customizability — being able to design your blog to look the way you want it to
Divi is the #1 theme on the market for beginner bloggers when it comes to both user-friendliness and customizability.
When you purchase Divi, you also get access to the entire Elegant Themes market, which means that you can also choose from over 70 other themes if you decide that you don’t love Divi.
This is also the theme that we recommend in our course and what most of our students start out with.
3. Jasper (AI Writing Tool)

Jasper AI is by far our favorite AI tool on the internet.
Long gone are the days of putting pure thoughts to paper (or laptop) when writing blog posts.
A good AI writing tool will help you write 10x the amount of content 10x faster.
Jasper AI is one of the best AI tools out there specifically for bloggers and content creators writing articles, emails, and other social marketing posts and promotions.
They have tons of different templates that you can start with and even a one-shot blog post that will help you write an entire blog post in seconds.
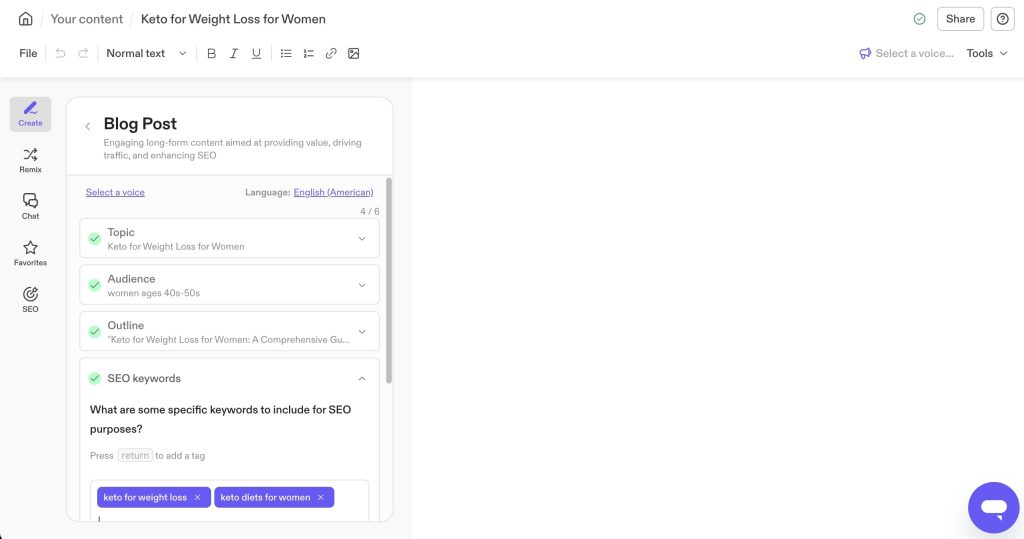
This is the main tool that we use to write our articles each week!
4. Surfer SEO (Improve Blog Post Rankings)
This is one of those blogging tools that could arguably fall under the categories of writing, keyword research, or blog growth. It can honestly help with all 3.
But I’ve included Surfer SEO under the blog writing category because it’s a tool that you will want to use as soon as you’ve finished writing a blog post.
When you run your posts through Surfer SEO, the software will give you a content score to help you see how your content might rank against your current competitors.
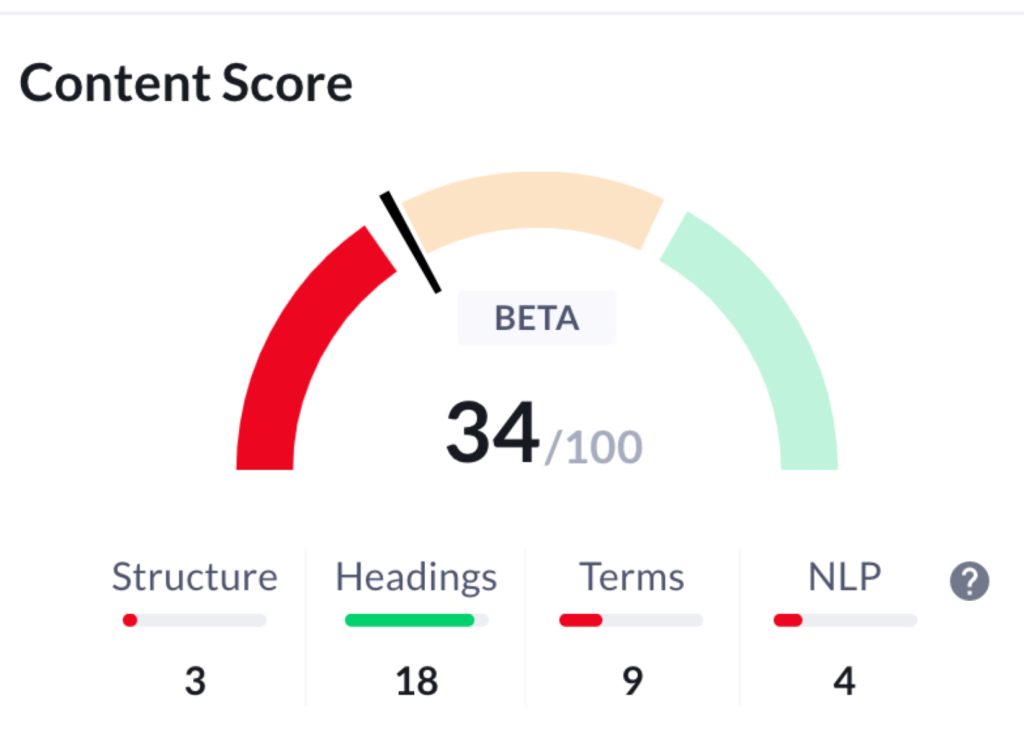
It analyzes many aspects of your post, including the structure, headings, and keywords.
Surfer SEO will analyze the keywords found in your post, suggest new or alternative keywords, and give you recommendations on exactly how many times you should consider adding those keywords in your post.
It will also tell you how long your content is in comparison to the top-ranking content on Google and honestly so much more.
This has been one of the most powerful SEO tools that we use to help rank our content.
The next set of blogging tools is all related to SEO!
Keyword research is essential for search engine optimization, or SEO, which is what helps your content get found in search engines like Google (or Pinterest and YouTube).
It’s not enough to just write great content. You also need to use the keywords that people are searching for to make sure that your content actually gets seen.
You also don’t want to guess what these keywords might be, especially when there are some great keyword research tools out there on the internet.
5. Kit (Email Marketing)
If you haven’t started building your email list yet, this next one is one of the best blogging tools you need to implement from this article.
Email marketing is the most important first step you need to take to start making money blogging.
Emails help you connect on a more personal level with your audience and begin building a relationship with them. The trust built in that relationship makes them more likely to buy from you.
So, how do you start building that relationship?
Kit is our favorite tool to build and foster relationships with your audience.
There are a LOT of different email marketing platforms out there and a lot of them are pretty comparable in terms of price and features, but most of them suck in performance.
They try to offer too many features, which makes the software unnecessarily complex and great at absolutely nothing.
The founder of Kit, Nathan Barry, was a blogger himself before he started the company. He designed the platform to work specifically for bloggers — not eCommerce owners, software companies, or anyone else.
My favorite feature of Kit is the ability to edit all of your emails in a particular sequence in one screen:
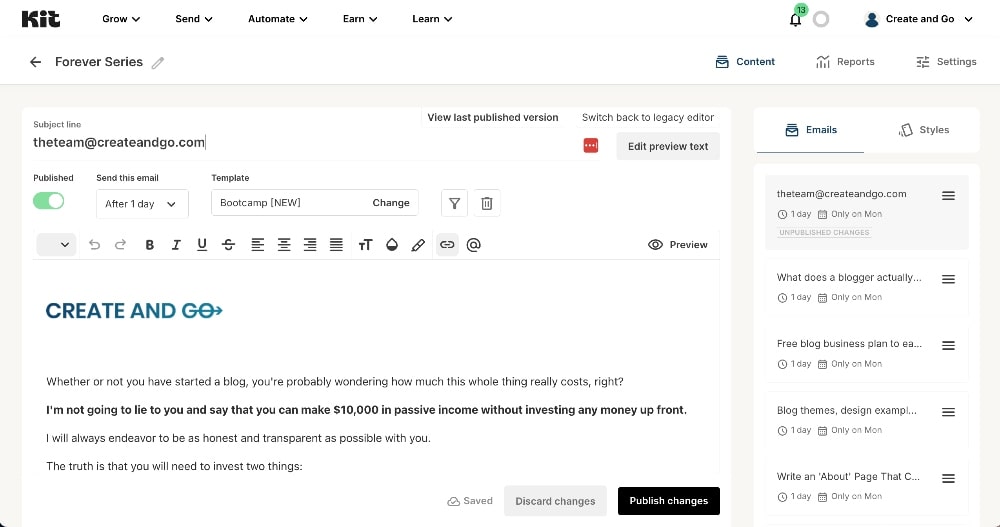
It seems like a no-brainer, but we tried several other email marketing companies that made you jump through several screens just to be able to edit a single email.
This meant a lot of extra time editing emails and it also made it harder to see how your emails “flowed” from one email to the next in a sequence.
The moment I tried Kit out and used this feature, I was hooked. We have used them ever since.
Kit also comes with a ton of customizable landing pages and forms that integrate with WordPress to help you turn more readers into subscribers.
Here is an example of the types of forms you can create with Kit:

Kit also has a great free plan that you can start with.
6. Kajabi (Sell Courses)
Kajabi is what we use to sell our signature course, Six-Figure Blog Builder. The software comes with everything you need to build and sell your own online courses (and beyond), including:
- Sales and landing pages
- Checkout pages
- Course curriculum
- Email marketing
- Podcast hosting
- Website builder
- Community and membership programs
- Affiliate program (so other people can sell your course as an affiliate!)

This translates into an awesome user experience for your customers and they get access to the course right away, so you don’t have to do anything else!
I met the Teachable team, including the founder of the company, in San Diego at a conference, and they are a really awesome group of people who care about their customers a LOT.
They also have a 14-day free trial you can start with!
7. LeadPages (Lead Generation and Landing Pages)

Continuing with our theme of email-related blogging tools is landing page software.
Once you’re ready to start building your email list, how do you actually people to sign up?
This can be done in a variety of ways, and Kit actually has great landing pages and forms that come with their service. So if you’re on a budget, you should start there.
But if you’re looking for a way to create more customizable and robust landing pages for maximum email conversions, LeadPages is your best bet.
LeadPages is landing page software that allows you to create beautiful landing pages that can be used for collecting emails, selling products, etc.
Most new bloggers add a small “subscribe here” form at the bottom of their posts and then wait for the subscribers to start rolling in… It doesn’t work that way. Most people won’t make it to the bottom of your articles to see it.
You can expect about 2% or fewer readers to use a form at the bottom of your posts. A good landing page can convert upwards of 50% or more of those same visitors!
TL:DR: If you’re not using landing pages to get subscribers on your blog, you’re sitting on money.
8. Canva (Design)
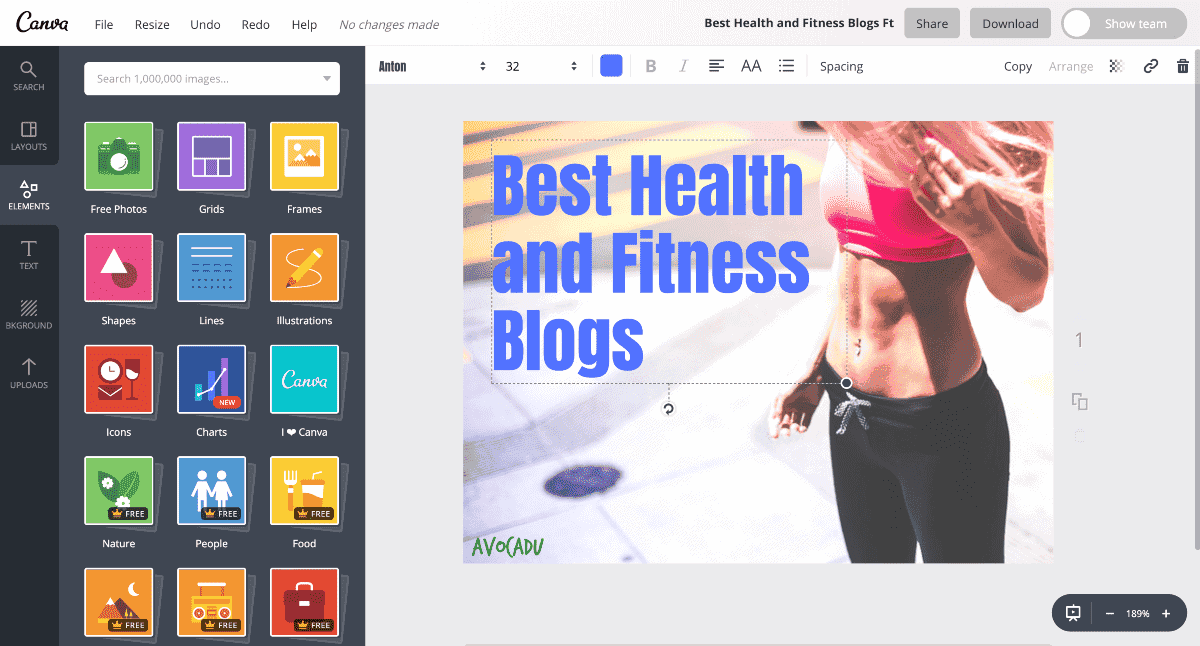
Canva is hands-down one of the best blogging tools on this list. Probably my personal favorite.
It’s is a free, web-based tool that allows you to easily create and design images for your posts, product images, social media graphics, and more.
They also have thousands of design templates to help you get started!
Some of the features include:
- Upload images or use their stock images (both free and paid options)
- Add text overlays, charts, and icons
- Save files as either images or PDFs
- Copy your designs and change sizes
- And more!
The best part is… It’s super easy to use! The learning curve is very small, unlike Adobe Photoshop.
Technically, Canva counts as one of the best free blogging tools on this list, because they do have a great free plan.
But I personally use the Pro plan because it comes with all the stock photos you’ll ever need + really helpful premium features like automatic resizing and saving with a transparent background.
9. Grammarly (Grammar and Proofreading)
Have you ever received a comment on your blog from the grammar police?
I think it’s quite hilarious when people take the time to read your entire article and then leave a lousy comment letting you know that you misspelled one word along the way.
Sure, I’m happy to fix the error but it’s comical to see how much time people spend concerned about other people.
If you’re anything like me, you tend to type as you talk and think things out in your head, which means that you tend to make spelling errors and grammatical mistakes often.
I even proofread my content after writing it and usually multiple times but I STILL miss grammatical mistakes.
When you read over your own content, you tend to skim over it because you already know what it says. The alternative is to have someone else proofread your content but this can be costly and more time-consuming.
Grammarly to the rescue!
This software is one of the best blogging tools out there for grammar and proofreading that is totally free! (They do have a paid plan but the free plan has always been sufficient enough for me.)
Grammarly automatically checks your work for most spelling and grammatical issues and proposes changes to fix the errors:

You can do this by uploading Word documents to their software to proof before adding your content to WordPress or you can use their browser extension and fix corrections right within WordPress:
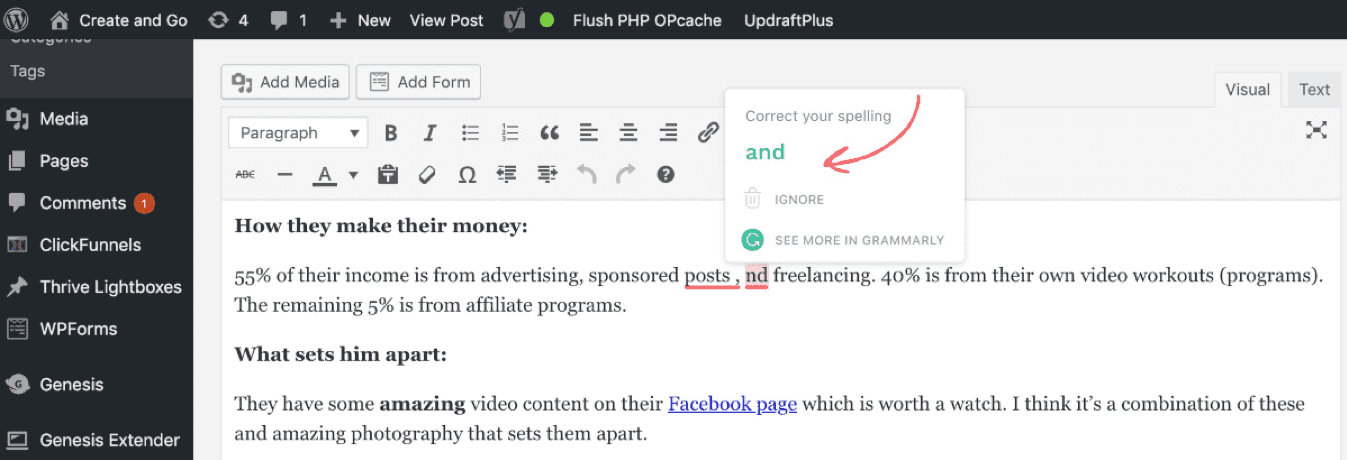
You can choose to accept their corrections or ignore them.
Now, this is not a complete substitution for proofreading or double-checking your work. It’s still a computer checking your work, so it definitely does miss some things.
For example, it often doesn’t catch words that are spelled correctly but simply added in the wrong place.
i.e. It wouldn’t catch sentence this because spelled correctly all words.
That sentence doesn’t make sense and is missing some words but everything is spelled correctly, so Grammarly won’t catch it.
You still need to proofread all of your work but it will catch mistakes that you notice or miss, especially if you’re a fast typer like me!
10. Ubersuggest (Keyword Research)
A lot of keyword research tools are expensive and pretty complex — aka not ideal for anyone new to the online business world. If you’re just getting started with the basics of SEO, the best free keyword research tool out there is Ubersuggest.
To use this tool, simply type in a general keyword related to what you want to discuss. For this example, I used the keyword “Yoga Poses:”
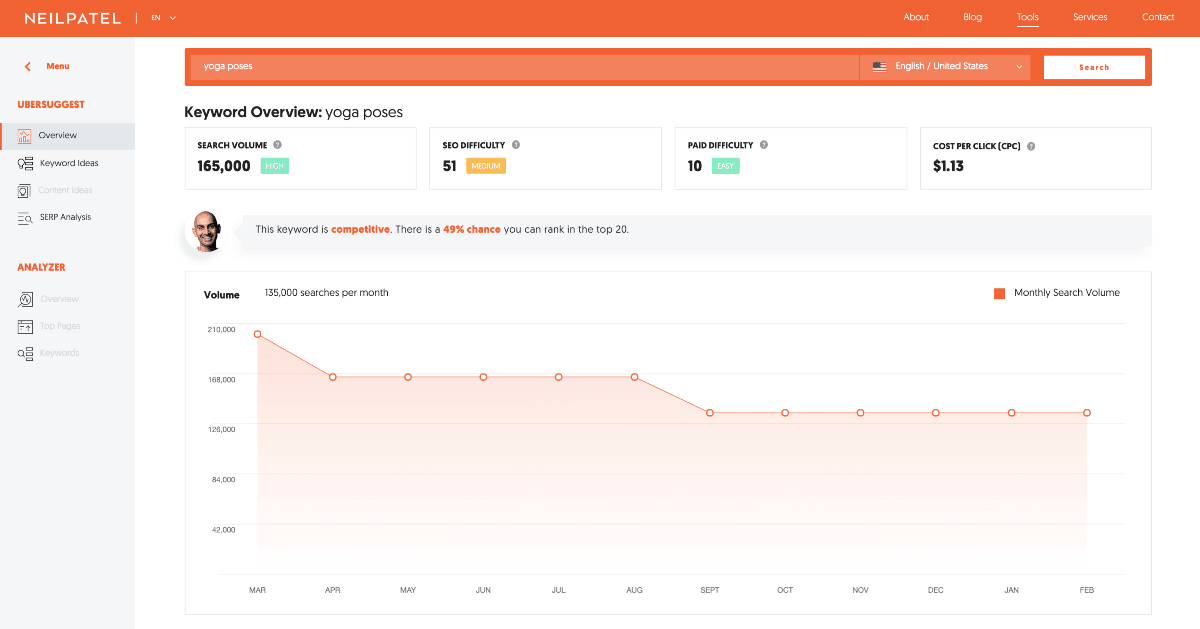
The data above shows me that the keyword “Yoga Poses” has an average monthly search volume of 165,000 and a ‘medium’ SEO difficulty.
A ‘hard’ SEO difficulty would mean that it would be pretty hard for me to rank for this particular keyword because it’s very competitive. A ‘low’ score would mean that it would be a great keyword to go after because it’s less competitive.
In keyword research, ideally, you would find the keywords with the highest search volume and the lowest difficulty score.
The high search volume means the potential for a lot more traffic and the low difficulty levels mean the keyword isn’t too competitive and hard to rank for.
Unfortunately, most of the highest-volume keywords are pretty competitive, as you would imagine.
You need to find a good balance between search volume and difficulty level, and this is where “medium-tail keywords” and “long-tail keywords” come into play.
Let me illustrate this by taking the above example a step further… If you scroll down, you’ll see some additional details about the “Yoga Poses” keyword that we searched for:
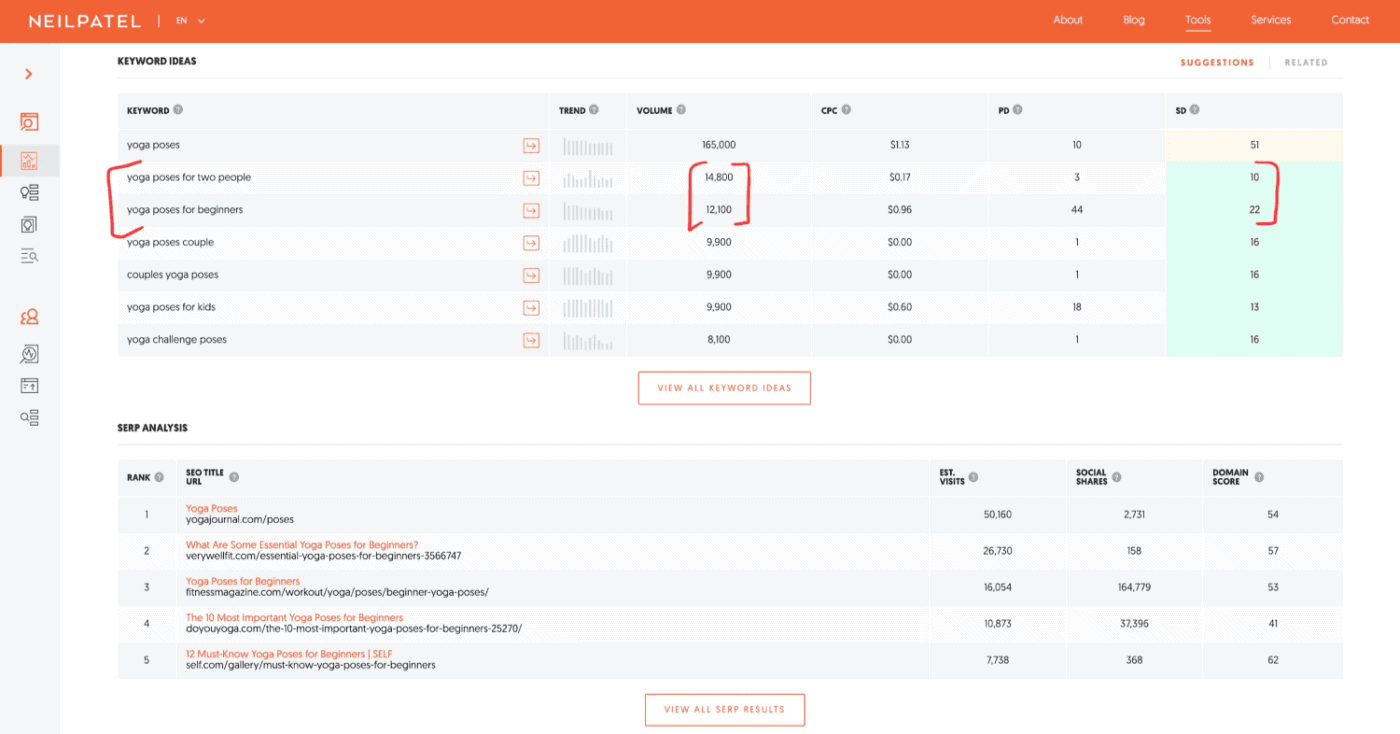
Ubersuggest will show you a comparison of the keyword that you searched for plus related keywords so you can compare and contrast the search volume and difficulty.
I highlighted the keywords “yoga poses for two people” and “yoga poses for beginners” because they had a relatively higher search volume but a relatively low difficulty score compared to the other results.
Rather than trying to rank for “yoga poses,” which is pretty competitive, a better strategy would probably be to write a few articles on the other keywords in the list above because while they don’t provide as much traffic, they are much easier to rank for.
The traffic from other “lower” volume keywords will end up adding up over time if you can rank for a few of them!
Ubersuggest is seriously one of the best SEO-related blogging tools you can get started with. And when you’re ready for the big leagues, I’ve got you there too.
11. Ahrefs (Advanced SEO Tool)
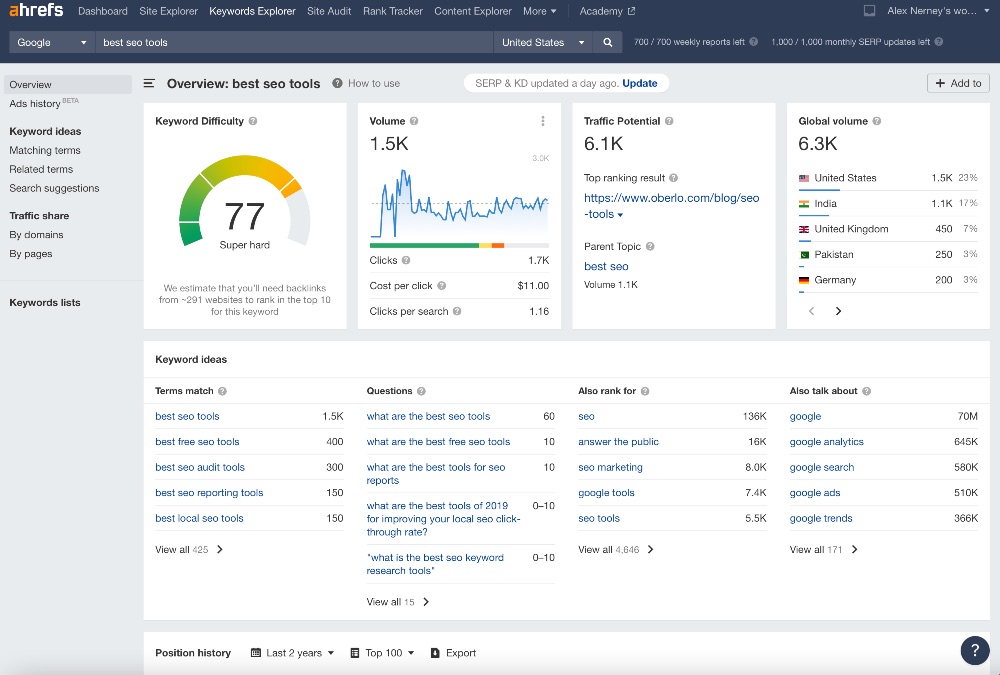
Ahrefs is a very extensive keyword research tool that provides data on certain keywords, including search volume, related keywords, top articles ranking for that particular keyword, and more:
It’s one of our favorite SEO tools because of the information it provides on your backlinks.
Acquiring backlinks from websites with a high domain authority is one of the quickest and best ways to get more Google traffic.
In addition to the backlink information, it also has a really awesome keyword explorer that gives you a ton of valuable information on the keywords in your niche.
Ahrefs provides details on your domain and your content relating to:
- Keywords Analysis – See what keywords you’re ranking for and what potential keywords would be valuable for your content
- Website Traffic – Number of page visits, what articles people are visiting most, average time spent on your website, etc.
- Bounce Rate — Remember what we discussed before about page speed and bounce rate)
- Backlinks – Who is linking back to your blog
You can also run “site audits” on your site to see what you’re doing right and where you could use some improvement to help boost your SEO score.
Ahrefs is what you want to use when you’re looking to optimize what you do and get a competitive advantage over others in your niche.
12. Google Drive (File Storage)
Storytime… I once spilled an entire glass of sparkling rosé all over my Macbook Pro while trying to take a photo for Instagram.
It wasn’t my finest moment. At the end of the day, I was out a few hours and a little more than $1,000.
The good news: I didn’t suffer any major setbacks because I didn’t lose any of my important files or data. Because none of it was directly stored on my computer.
Google Drive is a really great solution for document storage so that you can access your documents and data from anywhere and won’t lose it if something happens to your computer.
Other great options: iCloud storage or DropBox
We used DropBox for a long time but eventually switched over to Google Drive because we were using Gsuite for our work email accounts anyway.
13. LastPass (Password Management)

Blogging tools for password management are absolutely VITAL as your blog grows and especially when you start building a team to help you.
Do you have any accounts that you NEVER seem to be able to remember the password to?
I have some that I have to reset every time I try to log in because they require me to have some random extra characters I normally don’t use or they won’t let me use an existing password twice.
Sigh. It frustrates the heck out of me.
LastPass is a tool that stores all of your passwords for you so you can log in anywhere in seconds!
You can still set your own passwords when you create a new login for a site or you can let LastPass generate a more secure password for you.
The browser extension makes it super easy to log in to any site that you have a saved password for. So, when you visit a website, you can click the LastPass icon on the right to pull up your login credentials.
There is also a mobile app version so that you have access to your stored passwords on your phone as well!
I think this is even more important when you are running an online business because the more your blog grows, the more accounts you’ll have to set up along the way.
The next set of blogging tools will help you improve your content and traffic performance to get more visitors to your blog.
14. Rank Math (SEO Plugin)
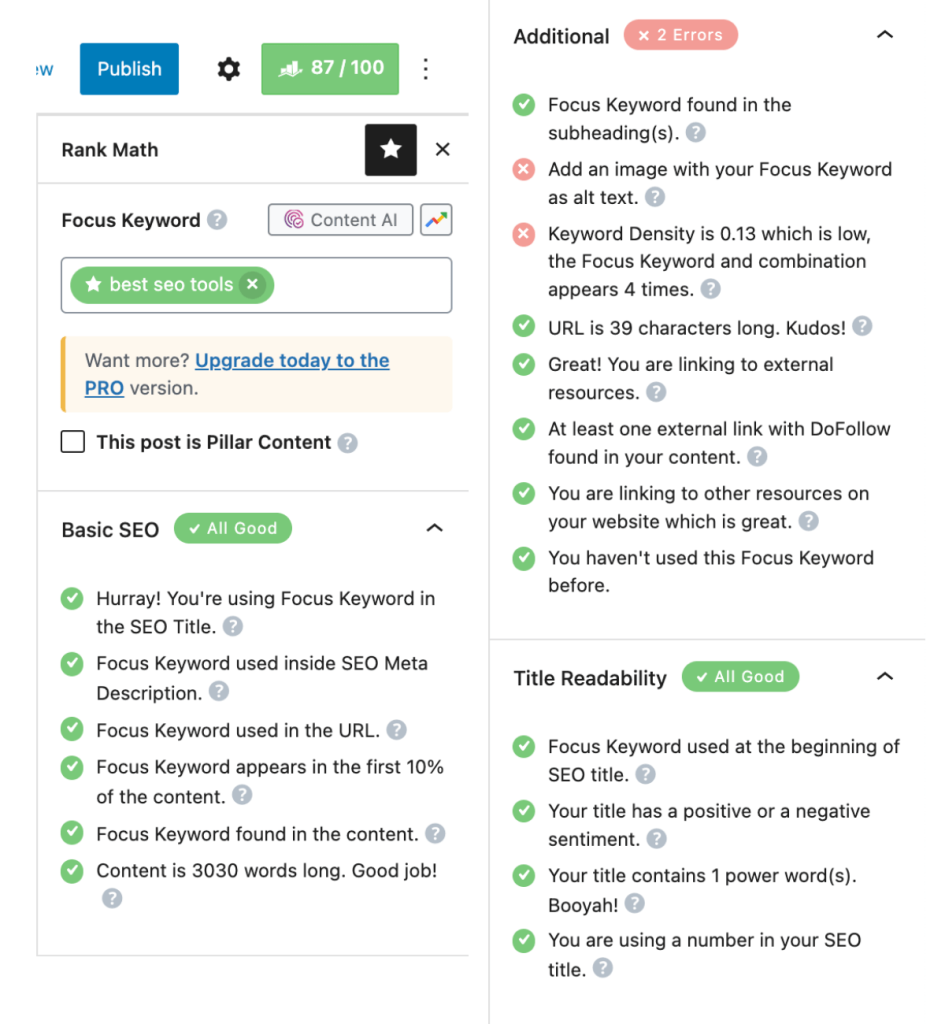
This is another one of our best blogging tools to help with SEO.
Optimizing your content for Google SEO is TOUGH work and it’s not something that we think most new bloggers should be too focused on in the beginning.
That being said, it’s important to take at least a few basic steps to make sure that your content is looking good for Google.
The best tool for this is a free WordPress plugin called Rank Math.
Rank Math gives you a basic overview of how well your posts are optimized for basic SEO principles using a score-based system (out of 100 possible points), paired with a traffic light system:
- Green Light — You’re in the clear and your post is looking pretty great in Google’s eyes.
- Orange Light — There is some room for improvement and a few things you need to work on.
- Red Light — Your post isn’t optimized at all and you have a lot to work on.
Rank Math will also tell you exactly what you need to do to take your posts from a low score and yellow or red lights to a high score and green lights!
It’s the best way to put in a little bit of extra work that translates into a lot more optimization for Google traffic.
A lot of the best blogging tools already mentioned will help you monetize your blog in that they help you optimize content, drive more traffic, etc. But this next blogging tool will directly help you make money.
15. Ezoic (Ads)

Ezoic is a premium ad network that will help you start monetizing your blog and all of that traffic on articles that you have no other way to monetize.
It’s our favorite ad network for bloggers to get started with because there is no cost to get started and how easy it is to use and get ads set up on your blog.
Ezoic has a minimum traffic requirement of 10,000 sessions and one of the lowest commission rates of 10% (compared to 15-40% that many competitors take).
Our recommendation is to start with Ezoic and then upgrade to Mediavine when you reach 50,000 sessions in 30 days.
16. BeFunky (Image Resizing and Editing)
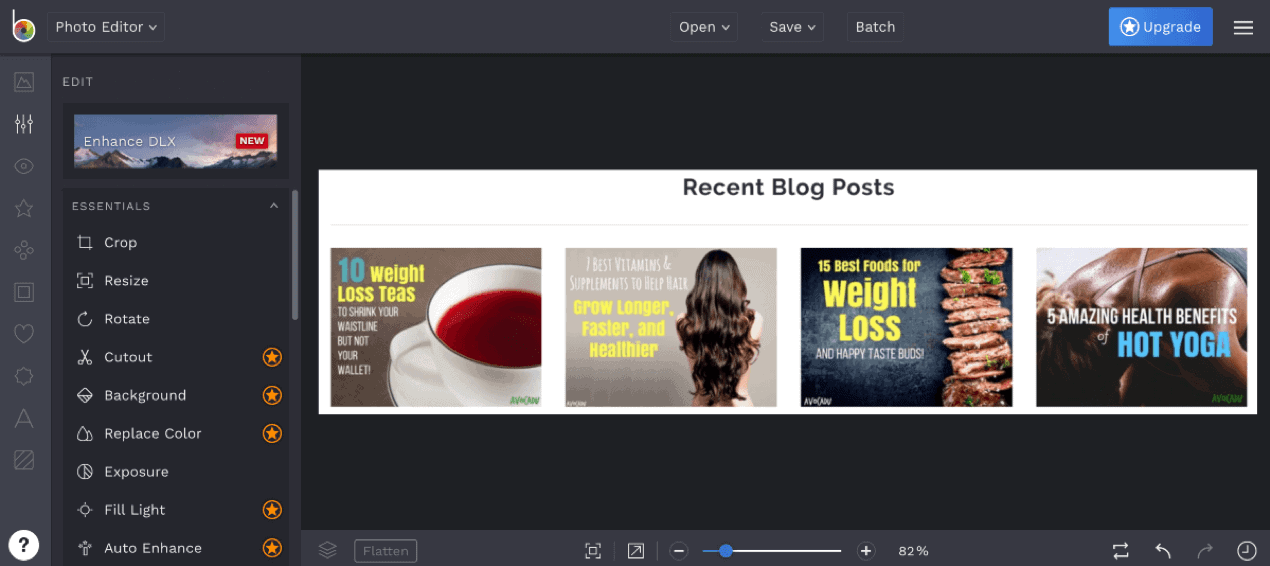
I use this next blogging tool mainly to resize my images before I upload them to WordPress.
The images that you upload to WordPress should always be the smallest file size because the larger the file size, the more it will slow down your website.
While Canva is really great for creating images, BeFunky is a great free tool for resizing and editing images. You can use Canva for this too, but I find this free blogging tool easier to use for quick resizes.
You can also make simple edits like adding borders, text, colors, touch-ups, etc.
On this blog, I take a lot of screenshots to show software (this article is a prime example), and screenshots are generally very large, high-quality photos that take up a lot of storage space.
I use this software to resize the images for my blog so they aren’t quite so large.
But after resizing them in BeFunky, there is still another step you need to take to further reduce the file size before uploading the image to WordPress.
17. Optimizilla (Image Compression)
Continuing with our discussion above about how images can slow down your blog… It’s actually not enough just to resize images. You also must compress them to minimize the file size.
Optimizilla is a free tool that compresses your file into a smaller file size so that it takes up less space on your website.
I love Optimizilla because it’s a free web-based application that allows you to drag and drop image files very easily and compress them in seconds.
It will automatically compress the file for you:
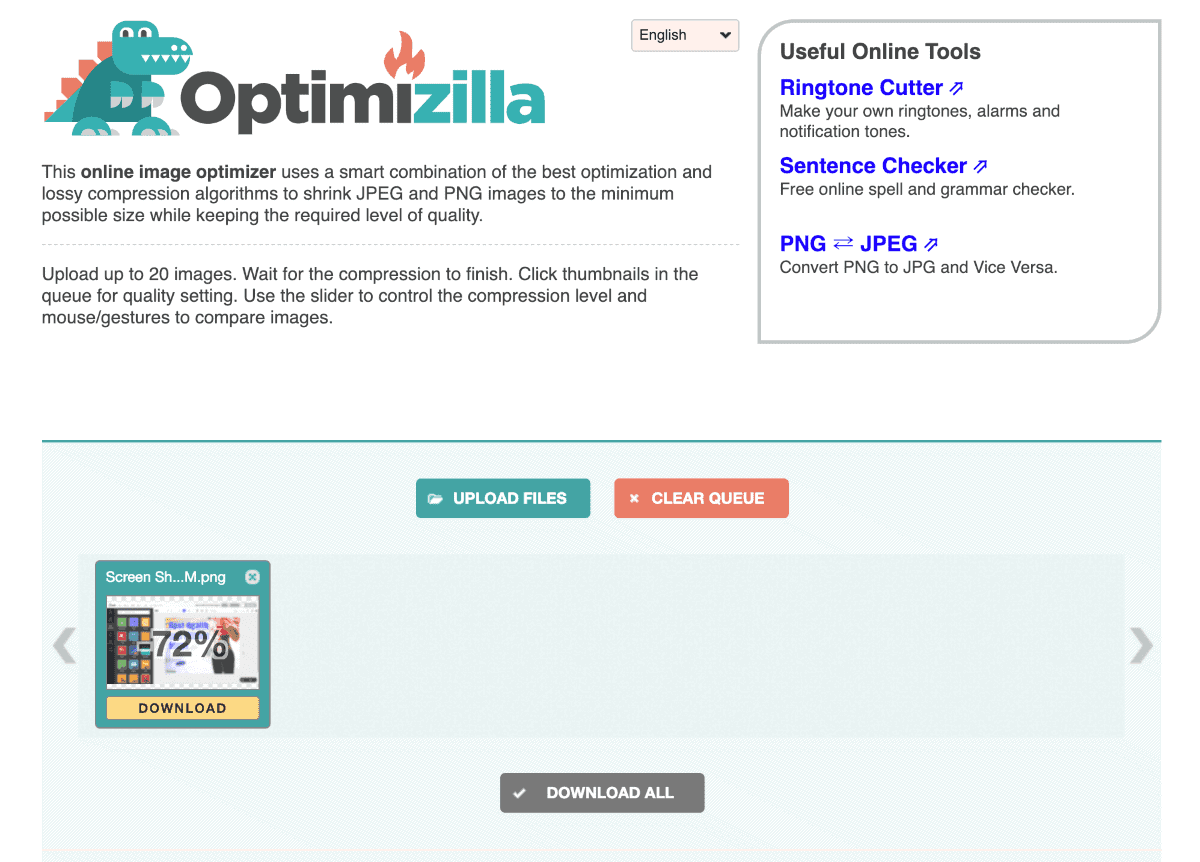
The 72% compression resulted in a reduction in the file size from 455K to 82K.
You can also change the compression settings:
- More compression = lower quality but lower file size.
- Less compression = higher quality but larger file size.
In addition to this tool, there are also a couple of plugins that you can install on your blog to help with image sizes and compression:
- Resize Image After Upload – Automatically resize your images to a specified width and height on your blog to reduce the file size and loading time on your blog.
- Optimus – Automatically compresses and optimizes photos uploaded to your blog (sometimes up to 70%)
I hope that you are able to use a few of these best blogging tools in your own business!
Summary
Here are a few other noteworthy blogging tools that didn’t make it to the priority spots on this list but we also use or have used to grow our business:
- BuzzSprout (podcast hosting)
- Tailwind (Pinterest traffic scheduling and analytics)
- SEMrush (SEO, keyword research, and analytics)
- Slack (team communication and project management)
- Clickfunnels (sales and landing pages)
- Coschedule (marketing calendar and headline analyzer)
- Fiverr (Outsourcing tasks)
- Shopify (Online stores)
- PureChat (Sales page question box)
What changes are you going to make after reading this article? Which blogging tools do you think will make the most impact in your business right now?
Did I miss a blogging tool or two that you’ve found really helpful or that has helped you succeed? I’d love to hear from you in the comments section below!
This is so useful! This is absolutely the best recourse I’ve ever found for working on a blog, and takes it seriously as an investment. You’ve made the concept so accessible, thank you.
Thanks, B! Happy to hear you find it useful 🙂
This is a great list for beginner bloggers like me. Thanks for sharing!
You are so welcome!
When adding you articles to Wordpress do you use the block editor or divi to layout out the copy and images? What I’m really asking what is the best and easy way to keep a consistent layout without too much styling?
Hey Manjit! We recommend using the WordPress block editor for individual blog articles.
Hey Alex and Laura, Please recommend a Wordpress Plugni to build drag-and-drop product comparison table. While I found WP ComPEAR interesting, but since it is built by sole individual, I am not confident on the product support. Look forward to your recommendation on similar plugins. Thanks
Hey Srurabh. We don’t have a specific one to recommend. I suggest doing a Google Search for the best comparison tables for WordPress.
Have you considered Rank Math SEO? I used to use Yoast but recently switched because I found Rank Math has all of yoast’s features plus schema integration. So far I’ve found they have AWESOME customer service and have actually liked the upgrade a lot! Though it is slightly less user friendly for those new to Wordpress. Just food for thought <3
We don’t have any experience with it, but thanks for the suggestion 🙂
This article mentioned that word press is one of the most widely used platforms. Which is definitely true i use it as well. When i started out i used it to start my blog. It is easy and straightforward. This article has added so much value for those looking to make a blog and go. One thing that helped me is that i created a checklist of off all the things i needed to do that led up to choosing the tools and resources and launching the blog.
Thanks Martize!
What do u use to write the posts? Do u write them in Word and then paste into Wordpress or directly in Wordpress? I’m finding Wordpress slow…
Hey Bob, it’s always good to write outside of WordPress first so you have a copy in case anything goes wrong 😉 You lose some of the formattings when pasting into WordPress from Word, but it does not take long to correct the formatting.
When was the last time you guys updated your 3 courses… I’m looking to buy soon
They have all either been updated or are in the process of being updated within the last 6 months 🙂
Wonderful post! Our blog has been online for 7 months and we started to notice 2 keywords that people are responding to in our posts. We just starting niching down on those keywords and blog traffic/email list subscribers are going up a lot.
Props to you for listening to your audience! I see you guys going far!
Thank you for putting this together – so much valuable information. I must have added at least 5 of your suggestions to my list of blogging tools. <3
Awesome!!
Thank you so much for this valuable information
You are very welcome!
Another helpful article that I am going to hang on to! If I wanted to use my own images, can I just compress them on Optimizilla and upload on my site? Or do I have to use all the tools you mentioned including the plug ins? Thank you so much for your in depth guides.
Really fantastic article! Thank you so much! This was a lot more straightforward than other blog tool articles I’ve read.
Thanks, Lyn!
is it ABSOLUTELY necessary to turn privacy off to transfer your domain to BlueHost? I don’t want to be inundated with spam and assume that when Privacy is turned back on info would still be out there
You don’t have to pay for domain privacy protection, but it’s highly recommended and definitely necessary IF you don’t want spam calls. Please know that this isn’t just with Bluehost. Anytime you purchase a new domain name (from any company), the transaction is a matter of public record. That is why spammers and solicitors start calling you. Every registrar offers the option to pay for domain privacy protection as an add-on.
THANKS !!! for this awesome post.
is their any copyright violation for using ‘canva”‘s design in your website and promotion in social media? it’ll be great if you can help me.
Canva has free templates that you can use and paid templates that have some limitations on distributions. You’ll have to read over their policies on their website for more information!
Awesome post guys thanks!
Hi Alex and Lauren, I’m curious to know which application you use to make your videos I saw in The Health Nerd. Thanks for your awesome very informative content.
Hey Angel. My brother is a professional videographer, and he uses two programs within Adobe Creative Cloud to animate the videos: Premiere Pro and After Effects.
-Lauren